fb icon

fb icon
Follow E-tek on fb!

August 24, 2012

Cool garage!!

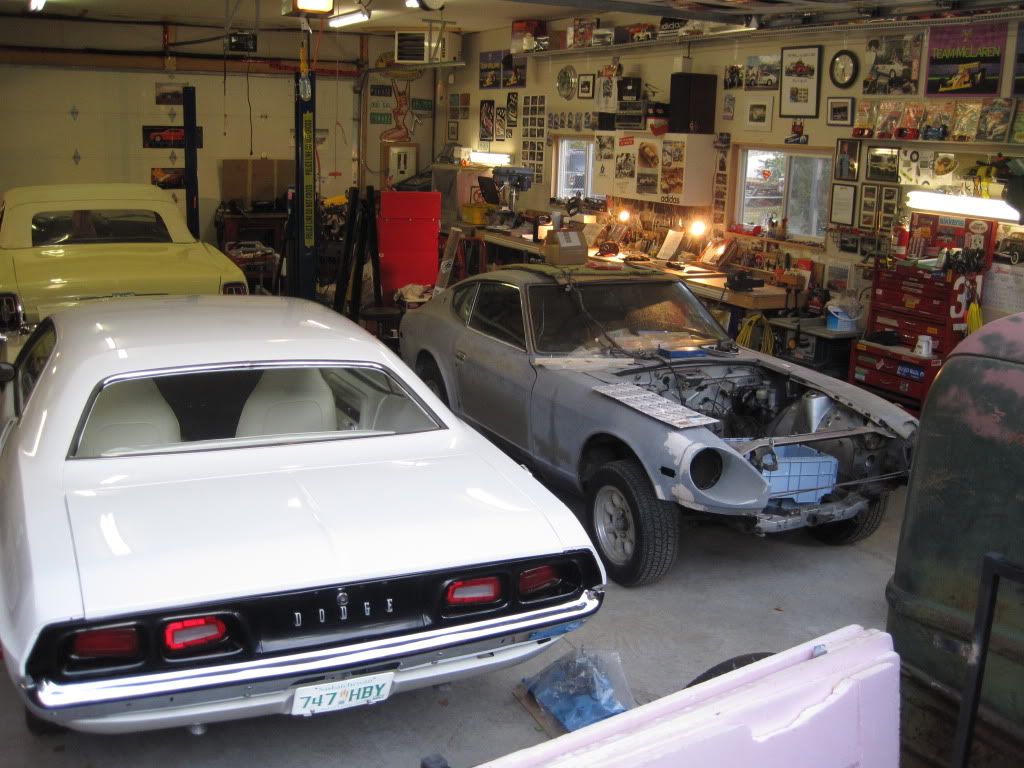
After a day of golf last week I drove by a new subdivision and this house caught my eye - it has a drive-thru garage with roll-up doors at either end, a lift and room to work and store stuff.


The large house caught my eye, then I saw the semi-transparent roll-up doors - of which the open side showed though to the other end where there was another roll-up door. I took a peak inside and called out but no-one answered, so I knocked on the front door and asked the very lovely wife if I could take a peek. She told me it was her husbands baby (of course) and he was a farmer and broker - sounds like a good gig!


Above is from the inside looking out, under the lift.


Nice storage - all in workshop red.


 Below - just some of the toys that were at the ready. 
There was also a tricked out ATV on the lift and more bikes in another area.


Thanks to the lovely Mrs and her cool husband in Warman, SK!


Don't forget to check out the website at www.E-tekRestorations.com !  
My son Colton and I decided to try our hand at a few "How - to" videos. This is his first attempt at making videos:

E-tek Restoration: 67 Cougar Metal Work 1

E-tek Restorations: 67 Cougar Metalwork 2

E-tek Restorations: 67 Cougar Metalwork 3

Tell us what you think!


 Don't forget to check out the website at www.E-tekRestorations.com !

August 19, 2012

IMG-20120730-00073.jpg


 I've found over time that the topic of welding wires can get confusing, but like many things, trial and error - and advice from others - is often the way to success. MIG wire can be purchased from cheapo-tool outlets like PrincessAuto and Harbour Freight, industrial application places like Acklands, as well as welding-sepcific stores like Cannox. After years of buying various wires, I've settled on ESAB or Lincoln brands, which are made by welding-specific companies and not sold in the cheapo tool outlets. Although all the part and classification numbers may be the same, the higher-end wires seem to flow better, require less Amperage to burn and thus don't burn through as easily and weld better over small metal imperfections like rust and paint. They generally come in 5 and 12 lb spools, so give them a try if you haven't.

Welding up the final piece of the Cougar puzzle!


This section of the Cougar was hit hard and repaired poorly - so it fell to me to cut away the worst of it and then make it whole again. After about 20 hours of fabricating and welding, the piece fit well and matched up to the quarter extension that bolts to it:


 Don't forget to check out the website at www.E-tekRestorations.com !  

July 22, 2012

Next in line at E-tek Restorations is a 40 Ford 2-door sedan custom. It already has the front clip done, a Ford 5L and some of the body mods done, but needs all the finishing work done. The owner stopped by this weekend to chat and brought his nice 56 GMC Step, which he built nearly 15 years ago!


It has a front clip, 350 Chev power and a custom bucket-seat interior. He put a lot of work into it including power windows, tilt steering, power brakes, a nice bed cover and GM seat-belt clips instead of chains to close the tailgate. Very functional -and reliable.


Now THAT'S a front end!! Canadian Classics Magazine did a story on it in August of 2002 and it's still going strong. We all know how life can sometimes get in the way of a project and 10 years later, he's still hoping to get his 40 Ford Custom done. If I can help him get 'er done he'll have a tough choice of rides!


                  Don't forget to check out the website at www.E-tekRestorations.com !

July 21, 2012

One of the problems with the net is how easy it is to post things in different forums and venues....but then things get chopped up and left all over.....So, if you don't see an update when you come here, please check the Garage Journal thread (link below) - I may have been there!

                                 E-tek's Project thread at Garage Journal.com


Don't forget to check out the website at www.E-tekRestorations.com !

July 15, 2012

Poor previous repairs....

The Cougar has been in a major rear-ender at some point in it life, where the end panel was replaces and the quarters where buckled. From the outside, the repairs were well-hidden and it looked OK with all the parts on. Once it was taken apart for restoration however, there are a lot of signs of a poor initial repair - or shaky foundations if you will. This leads to rust issues (slide hammer holes, welds holes left open), fitment issues (panel overlap, changing gaps, thick filler) and more.


Below, you can see how the end panel had been replaced and didn't quite line up. As well, the welds had been drilled or broken loose and then not refilled. The entire panel was tacked on with fewer than 6 welds.


Here are some of the many slide-hammer holes that were filled over with filler. This allows moisture to enter from the backside and allows rust to start behind the filler.


The trunk floor was still pushed up against the wheel well, which would mean that somewhere between here and the end panel was shorter than it should be.....somewhere.


The filler was thick enough in places I could use the air chisel to remove it. Like doing sculpture work. Behind this chunk were 5 or 6 slide hammer holes, again only filled by filler.....


Don't forget to check out the website at www.E-tekRestorations.com!  

July 1, 2012

My beautiful family!

I read a lot of other guys blogs and sometimes I wonder who writes them and if they have a life beyond their blog postings....

Here's my family - on their way to Last Day of School festivities (check that smile on Colton's face!)

Time to get up to date with the work on the 67 Cougar....

Although it hasn't been getting done as quickly as I (and likely Trent!) would like, there's been some good excuses, including a long bout of Pneumonia....but I have gotten a few things done and I have a month of time "off" to devote to shop time coming up - which should see the metal work get very close to complete.

Last episode saw the completion of the metal-work around the back window, quarter tops and filler panel. I left it in a skiff off metal-ready and I'll go back and attack all the sanding at the same time - once I separate the area off to somewhat contain the dust in the one area.


The Right quarter was next. Whoever did the repair last was not exactly a master metal-worker, but was pretty good at hiding un-repaired damage! That has to count for something...right? NOT.


A quick pass with the flap-disc revealed 1/2" of filler in this one spot. That meant there was a LOT more to come and there's no way I was going to sand it all out and coat the entire shop in a film of filler...


Looking at the inside, there where some pretty big gaps left in the seems - which tells me that's all filled with "bondo" from the other side....


So instead, I just cut it off with a cut-off wheel. This way the filler stays more intact making less of a mess. The difference is that you don't get to see exactly what's under it all - but in a patch panel situation, as long as you cut conservatively (a little at a time), there's no issue.


You can see the line I scribed where the new patch panel will sit and - although it'll be butt-welded - I want to make sure I don't cut away more metal than I should.


Even after cutting enough for the patch panel, there was still a fair amount of filler above it. This all had to go, which still made somewhat of a dust-pile. No way around it!


Inner (trunk drop off) and outer panels cut out:


I hate filler....

Trial-fitting new trunk drop-off. Even though this is way-early, I always put the new panels up to see where things will be going. This drop-off is made way longer/bigger than it needs to be, maybe so it would fit different applications. For this application, I'll likely get the outer panel tacked in place, then the inner, before trimming it out.


There's quite a bit of damage left un-finished from the last repair(s). There's gaps where none should exist and form lines had been pulled or hammer out. My job is to RESTORE, which means I put all these aspects back to how they would have been prior to being damaged and 'repaired'. I really enjoy this part of it - as it takes some creativity to figure out what lines go where and which tools will get me there. It also has a finish-line that you can see yourself getting closer to as you work.


Below you can see the work done in that area - about half way through getting it all back to 'normal':


Once the filler was all removed from the outer panel, I found signs of old-school repair methods. I used these methods in the 70's - the difference being that at my fathers shop, we would have welded up the holes from the slide-hammer screws! Now-a-day, you may still use a slide-hammer, but with spot weld-studs that don't damage the panel.


After removing all the undercoating that was hiding the damage from the inside, I sprayed any surface rust down with MetalReady - a Phosphoric Acid solution that turns rust (Iron Oxide) into an inert substrate (Ferric Oxide).

Next up is to repair the old damage on the quarter before final-fitting the patch panel. The patch is just large enough that I can cut-out any old damage around the wheel well and where it butt'sup on the quarter panel. It's going to make a much nicer repair than previous and of course alleviate an rust issues, including the opening of factory drain holes that were plugged with filler....

Don't forget to check out the website at 
www.E-tekRestorations.com 

Lately, I've been thinking about the Challenger I finished - and sold - last year. With the money I got I was able to buy another project (the 27 T), a few engines and some tools and even though I don't totally regret the sale, it will still go into the category of "ones that got away".... After five years of work it was a show car and a strong runner - but for some reason I just didn't want to keep it. I say it's because it's not a convertible, which I prefer - especially since we only drive them in the summer and 'verts feel so special....


A couple years later though and I still lament (different than regret?) selling it. Even though I "traded" it for all this other stuff (including the down payment on another rental house) I am now down to "only" 2 drivers and two projects. Oh well, I guess it's time to get that 240Z back to roller status - maybe that'll fill that hole in my automotive heart!


Don't forget to check out the website at www.E-tekRestorations.com

June 13, 2012

Getting BACK at 'er!

Whoa!! Haven't posted for a couple weeks due to being down and out with a case of  Pneumonia. Of course I wasn't right out - I managed to have enough energy one day to pick up this 1927 Model T chassis which will form the basis of a rod project I'm calling the "Pussycat Project":


The gentleman I got it off had a trailer FULL of parts he "inherited" from another old collector when he bought some land:


Got it home and pulled it off the trailer (which wasn't pretty due to not having a ramp)..


Upon further inspection, I found it came with several antique cans and bottles. Maybe some will make it into the final build...


Good front suspension, complete with I-beam, wishbones and steering links:


Rear end turns easily, tho the old banjo won't likely make it into the final iteration!


 I dug out 3-4 inches worth of accumulated mud from the seat pan...

To find very little - and I mean very little - rust under it all! Amazing.


The undercowl gas tank is also in good shape - no leaks!


I removed the rotting wooden box, again to find little rust underneath..


The wooden battery cover seems to have survived - unless it was rebuilt at some point..


Even our cat, Bubbles is getting into it!


 As for a power plant, I have lots of options, one being a Ford Big Block (FE) engine that is just going back together....