fb icon

fb icon
Follow E-tek on fb!

October 18, 2020

1956 International Harvester S120 4x4 truck Restoration

With the extensive metal work nearly completed, it's almost time for some filler work. Now filler (aka Bondo) has had many negatives attached to it, but only because of unscrupulous so-called bodymen who have historically used filler like they are troweling cement, or as a sculptor would use hunks of clay.

To start with, one has to know the MAJOR limitations of talc-based filler products: for one, filler should never be used to "fill" anything - only to smooth the final imperfections after metalwork has been properly performed. Second, talc-based fillers are NOT WATERPROOF - and as such, should never be W usedin an area or space that may get wet, or could hold moisture - and thirdly, it is not structural! It won't "hold" anything together, won't re-enforce anything and will definitely not flex.

For those last 2 items - waterproof and flex - the correct product to use is a fiberglass reinforced product. It comes in both short and long strand mixes and uses plastic resins to bind instead of talc. This product should be used over any welds, to "fill" anything deeper than 1/8 inch or if some partial re-enforcement is required. Again, it's not to be used in place of proper metalwork, but is a key product in bringing that fine metal work to its finished stages.


The other key consideration to filler use is proper panel prep. Many guys will just run some coarse paper over the area (or grinder) and slap on the filler when these products are meant only to go on to properly prepared metal. 

First step in preparing metal for filler is to treat any rust with a phosphate rust-converting product. My favourite has long been from POR15, which is a non-toxic phosphate wash. This product converts Iron-Oxide (Rust) to Iron-Oxite - a black hard substance that doesn't spread, which  means no bubbles will be popping through your expensive paint job years down the road!


The wash chemically treats both the rust and all the metal for maximum 
corrosion protection and adhesion:


Once the wash has sat overnight, it is cleaned off with a solvent wipe, which also degreases, 
removes  wax and dirt residues and ensures the perfect substrate for any filler work. 

Time for many hours of block sanding !

September 30, 2020

1956 International Harvester 4x4 truck Restoration - Sorting odds & ends

 With the major metal work nearing completion, its time to mock up the truck parts again and check for gaps, fitment and see if anything has been missed. Front end is going together here:


Beautiful all-metal work of art!


Now's the time to take stock of all the bits and pieces that will need to be cleaned, repaired and painted once the paintwork is done:


The original gauges cleaned up beautifully. Now I need to go through them to ensure they work.


 Original Steering wheels (made of Bake-o-light) has a history of cracking and coming apart on the metal backbone. Restoration of these is another skillset learned over the years:


Here's an example of one I restored for a 57 Chev 3100 Pickup
 (which won 1st Place at Draggin's Car Show, 2 years in a row):


And, while we're going down memory lane.... :)

1969 Camaro Complete Restoration, completed 2015


1940 Ford Coupe complete restoration, completed 2013.


Photogallery never complete without a shot of Mrs. E-tek!


September 17, 2020

1956 International Harvester S120 4x4

A look into the shiny future of this truck:


Polished hood edge chrome pieces....came up nice, but not show-perfect. If you look close there's a bit of pitting on the sides....would you send them for re-chroming?


Fender mocked up on box....looks good.


Before and after polishing up some dash knobs....can't wait to see them against fresh paint!


1956 IH 120 Series 4x4 restoration progress to date

 The truck is now 95% stripped to bare metal with 80% of the metal-work complete. A few rust patches to do on the cab, then we'll mock it all up and start the filer work, which will likely take up a couple hundred hours of labour....


September 3, 2020

Porsche Diversions Porsche Diversions

After pounding out nearly 100 hours straight on the IH box - it was time for some alternative entertainment....of the German kind:

The E-tek Porsche Boxster is a completely different ride than is the '67 Galaxie, the 46 Merc, or the 71 Datsun. It's fast, smooth, classy and a completely different experience than anything else I own. But over the summer, the German super-sport had begun to fail. Idle started to get choppy. It began to lurch and then, last week, warm-up started taking longer and idle was almost non-existent.

Being a new, sophisticated, EFI model, many people would shy away from trying their hand at trying to fix it's woes. But in reality, the newer machinery, with it's complex computer systems and multitude of sensors, is actually quite easy for the do-it-yourselfer to remedy. Most issues are due to either dirty - or damaged  - sensors and the ODB system points you in the general direction. All you have to do is plug in an ODB2 reader, Google the codes and then Google some forums to get the most likely answers to the issue.

In my case, my $50 ODB2 reader showed 3 codes: P0102, P1126 and P0507. Plugging them all into Google led me to the Pelican Parts (http://www.pelicanparts.com) technical page. Pelican Parts is a European specific repair shop online presence, with parts house and information center run by some of the nicest guys I've ever met - online.


Porsche Technical Articles
Welcome to our Porsche technical articles section. Technical Article Directory orBulletin Board.


After reading some of the tech articles and conversing online with one of their tech experts, I learn that P0102 is the Mass Airflow Circuit, P1126 an O2 sensor code and P0507 an Idle Air Control System error code. Translation?  The MAF sensor and throttle body needed to be cleaned!

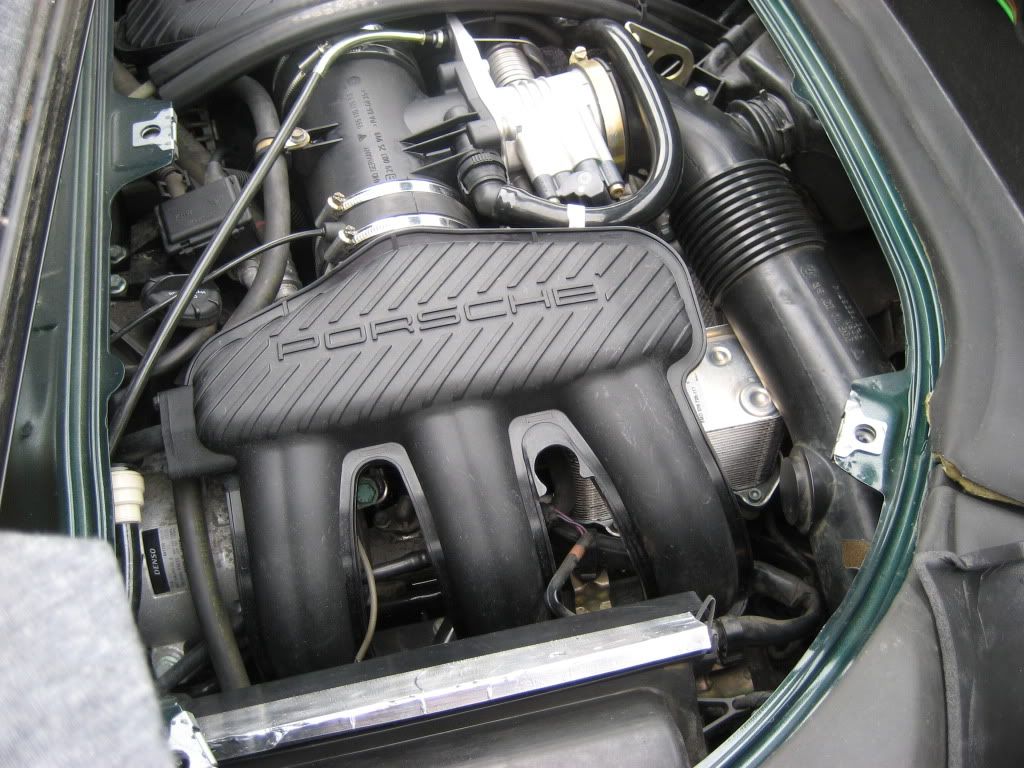
So off I went into the shop, grabbed a can of Thottlebody cleaner and one specifically for MAF sensors and went to work. After putting the Boxster into engine-access mode (roof half up, engine covers removed), I removed both items from the engine and proceeded to clean them up:


MAF sensor location: Both the MAF and TB are fairly easily accessible, if you don't mind leaning over the ass-end of your boxster for several hours....


 MAF sensor removal: Oddly, Porsche decided to use T20 Security Torx screws on it, which is great because I got to use a tool that until this point, laid dormant in my tool box!


Security Torx have a little 'nipple' in the middle, so a special driver bit is required:


Once the MAF and TB were out, they got spray-cleaned with specific cleaners available at any auto-parts of general goods store. I got mine at Ukrainian Tire.

Image result for Porsche MAF sensor

Good MAF photo with insets of wire connection, T20 Secure-bit and a can of CRC's MAF cleaner. (From Pelican Parts)


You can see how this might affect performance.... The dirt and intake crud was probably affecting how much the throttle plate could move - and especially close - causing the "Idle Air Control" error.


Half-cleaned:


One side cleaned:


Other side cleaned:


Cleaned MAF:
Image result for Porsche MAF sensor


Once everything was re-installed, I cleaned up the engine compartment and - with fingers crossed - started it up. And WHAT A DIFFERENCE!  Every issue I was experiencing prior was gone. With the ODB2 Code Reader I reset all the codes and took it for a test drive. Driveability was back to normal and NONE of the codes returned. Who said Porsche's cars were expensive and hard to work on? In my book, THAT'S a cheap fix!

Image result for porsche boxster engine compartment

So, with the drivers back in order, I can enjoy what's left of summer cruising while continuing the restorations on the IH and the 240Z. I LOVE cars.