fb icon

fb icon
Follow E-tek on fb!
Showing posts with label POR15. Show all posts

September 17, 2021

How to: Storing automotive paints (Top Tip!)

I learned this trick a long while back, but like many things I should have done, I didn't use it when I should have and wasted a LOT of paint over the years....so now I keep what I need WITH my paint supplies....

We all know that paints react with air, slowly gelling the top layers, turning it into a skin and eventually hardening the paint through the remainder of the can.  


Single-stage epoxy's however, take it one step further and as the product reacts with the moisture in the air and don't just dry, they catalyze. Slowly, single stage epoxy's like POR15 and Rust Bullet will turn into a cement-like substance in the can when exposed to air. As an example, this is the container I use to transfer POR15 from the can. 

The bottom layer, exposed to the moisture in air, is hardened like cement!


The answer - for any type of paint - is to not allow ANY air to come in contact with the paint in the can. Putting the lid on won't do it either - the air  (and moisture) is already in there. But since our garages are not science labs (close maybe!), you likely don't have the ability to form a vacuum, with a high end vacuum tube.

But most of do have an inert gas that can displace air!


Butane is an inert gas, similar to Argon, which is heavier than what's in our air (mostly nitrogen) and can DISPLACE air, thus effectively SEALING the paint off and removing the interaction of air and moisture with the paint.


All you need to do is turn your Butane lighter on (no flame of course!), or discharge it directly from the refill can, into the can of paint - lid on or off  - as per below:


The Butane will sink to the bottom and settle on top of the paint, thus displacing the air. You don't need to know how much Butane is in the can, as long as there's some it will settle on the paints' surface and form a barrier to the air around and above.


Once it's in there, put the lid back in - or seal the hole - as in our case!  
Your paint will now last virtually forever, as fresh as the day it was opened.


If you've ever used POR15, you know why there's a hole in the lid....if not, well, let me tell you: POR15 cures like CEMENT in the presence of moisture, which basically means air. Any POR15 you get between the lid and the can will catalyze and cement the lid to the can - FOREVER.  To get around this, you can either use a thin sheet of plastic to form a barrier between the lid and can, or pop a hole in the lid, using tape to seal it. With the Butane trick you won't need to worry about a little air transfer past the tape - and it seems easier and less messy that the plastic method.


Don't forget to add your email to our list of followers to get update notifications...
.,,, and check out our Facebook page at E-tek Restorations on fb   CHEERS!

September 10, 2021

1956 International Harvester S120 re-assembly


With the truck painted inside and out (and partially color sanded), it's finally time to tackle the re-assembly of all the bits and pieces. Although I'm still waiting on the rebuilt engine, re-rimmed wheels  and tires and re-upholstered seat set, I can get to all those peripheral parts in the interior, a well as the lighting, electrical, door glass and chrome. This is the reward for all those hours welding, hammering, sanding and sanding...and sanding....


Every itme going back is prepped and coated in either POR15 Semi-gloss, or Eastwood's Chassis Black which is a very Gloss Black.


The vent glass frame was painted in chassis black. Very nice stuff it is.


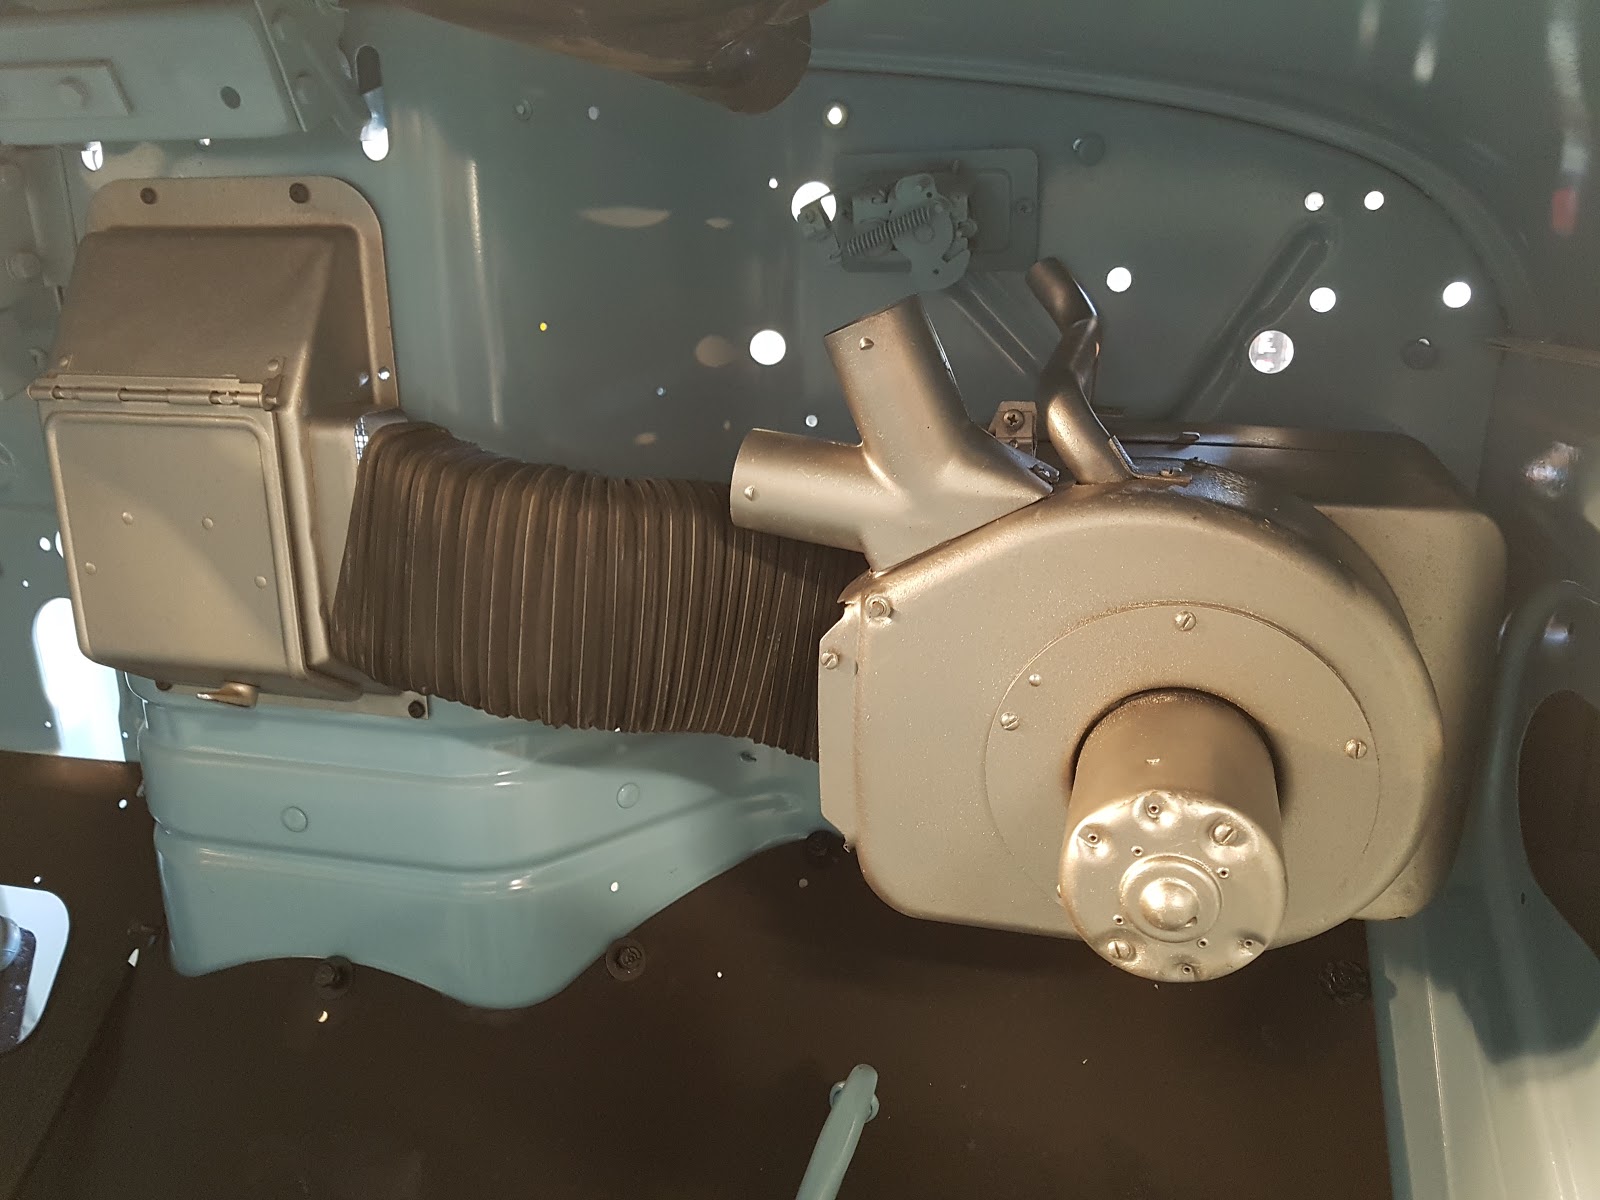
The heater box, motor and central mix-box was tested and installed next.


Windhsheild wiper motor was installed next.


One of the last items needing paint was the gas tank. As it was originally galvanized metal, I wanted to go with a silver hue, which luckily was one of the colors of the POR15 palette...


Unfortunately, the jar I had stored the leftover product in had a bit of an air-leak and - as I've talked at length in previous posts about the incredible hardening nature of this single stage urethane paint -  you'll know that this generally means premature hardening and issues with long term usage...

Sure enough, screw drivers and ice picks would not penetrate the hardened upper most layer:


It looked like it was still liquid further down into the jar, so I drilled a 1/2" hole
 into the top 1\2" hardened layer to get to the usable part below.


After a full coat it looked fantastic and will look 'show' 
once hung in it's original location under the running board.


               Stay tuned for more re-assembly on both the '56 IH 4x4 and the '72 Datsun 240Z!


October 18, 2020

1956 International Harvester S120 4x4 truck Restoration

With the extensive metal work nearly completed, it's almost time for some filler work. Now filler (aka Bondo) has had many negatives attached to it, but only because of unscrupulous so-called bodymen who have historically used filler like they are troweling cement, or as a sculptor would use hunks of clay.

To start with, one has to know the MAJOR limitations of talc-based filler products: for one, filler should never be used to "fill" anything - only to smooth the final imperfections after metalwork has been properly performed. Second, talc-based fillers are NOT WATERPROOF - and as such, should never be W usedin an area or space that may get wet, or could hold moisture - and thirdly, it is not structural! It won't "hold" anything together, won't re-enforce anything and will definitely not flex.

For those last 2 items - waterproof and flex - the correct product to use is a fiberglass reinforced product. It comes in both short and long strand mixes and uses plastic resins to bind instead of talc. This product should be used over any welds, to "fill" anything deeper than 1/8 inch or if some partial re-enforcement is required. Again, it's not to be used in place of proper metalwork, but is a key product in bringing that fine metal work to its finished stages.


The other key consideration to filler use is proper panel prep. Many guys will just run some coarse paper over the area (or grinder) and slap on the filler when these products are meant only to go on to properly prepared metal. 

First step in preparing metal for filler is to treat any rust with a phosphate rust-converting product. My favourite has long been from POR15, which is a non-toxic phosphate wash. This product converts Iron-Oxide (Rust) to Iron-Oxite - a black hard substance that doesn't spread, which  means no bubbles will be popping through your expensive paint job years down the road!


The wash chemically treats both the rust and all the metal for maximum 
corrosion protection and adhesion:


Once the wash has sat overnight, it is cleaned off with a solvent wipe, which also degreases, 
removes  wax and dirt residues and ensures the perfect substrate for any filler work. 

Time for many hours of block sanding !

July 30, 2014

1 year Update! POR15 vs RUST BULLET "Real World RUST PAINT Test"


July 31st, 2014 - the test plate I attached to the underside of my van was removed 364 days later, after having travelled approximately 45,000kms across the salted, sanded and gritty roads of Saskatchewan Canada, where temperatures ranged from +38C/100F to -40C/-40F and with constant speeds of up to 125kph/80mph for up to 5 hours at a stretch. While by no means a "scientific Study", it serves the purpose of showing how these paints perform in "real-world" conditions - when applied properly - and meeting or exceeding the abuse they would be exposed to in wheel-wells, frames, suspension components, trailers and other exposed, rusty or etched, metal surfaces it is intended for. Both paints also clain to be great for cement coating, but I have yet to have attempted their use on other substrates.

For details on how the test plate was prepared and the two brands of rust paints applied,
 please refer to my post of 1 year ago: Here.


Removing the plate:


And here it is, the even rustier control section is on the Left, the POR15 and Rust Bullet painted sections on the Right. The test peice and paints are still coated in a film of salt and road-grime.


Photo A - After an initial (dry) wipedown, the plate was placed on the original labelled board -


Photo B - Plate was flipped over, showing the underside  
after being cleaned with a water-dampened paper towel -


Discussion -
Both paints where largely intact and protective of the base metal underneath, suffering no major adhesion issues. However, both paints suffered minor damage and removal along the leading edge, an area subjected to direct contact from grit, stones, salt and more (top edge in top photo A, bottom edge in photo B).The uncoated section continued to rust, whereas only small sections of the leading edges of the coated sections did so. After wiping with a wet paper towel the sheen/shiny surface was returned and in good shape.

For comparison, here is the plate 1 year ago, when it was first prepared and painted with the two rust paints:


Overall impressions:
As promised by the manufacturers, both single-stage, air-cured epoxy paints did a very good job of protecting the metal substrate overall and sealing/protecting the vast majority of the coated surfaces. As mentioned above, both paints did suffer what I would term as a "minor" adhesion issue - damage/removal atthe leading edge, which would have taken a large amount of abuse from road debri and harsh weather conditions.

Due to the results of this test, I will certainly continue to recommend either paint and use them in my shop on both my own, and other peoples vehicles, with a good amount of confidence that they will remain on the substrates and protect them from deterioration in most conditions - when applied to surfaces that are either clean and rusty or clean and well-etched. They need a rough/porous surface to adhere to and many people report issues with adhesion when that has not been the case.

I would hazard a guess that "most conditions" these paints will be subjected to may or may not be as harsh as they were in this test, so your results may vary.

Thanks for reading along!.


                    Via www.E-tekRestorations.blogspot.com 


August 2, 2013

E-tek's Real-World Rust Preventative Paint comparison Test

After applying Rust Bullet to those 40 Ford inner fenders, I got to thinking that it'd be a good exercise to compare it to my current go-to rust rust-preventative paint, POR15, which I've previously reviewed on my site, www. E-tekRestorations.com, so a side-by-side long-term (12 month), real-world comparison with the newest rust preventative product in my shop seemed in order!


The substrate being used is an inner door frame support section with fairly even mild to moderate surface rust after being exposed to the elements for a couple of years in my metal bin.

POR15 and Rust Bullet were both brushed onto the test piece, directly over the rust, front and back, as per the manufacturers recommendations: one coat for POR15 and 2 coats for Rust Bullet. 

A clean brush and container was used for each product and the temperature and humidity were within manufacturers recommended ranges for best application. 


I affixed the metal to a white board and labelled everything to record the exercise, then I removed it and have placed it outside, where it will remain for the next 30 days. To test further the resiliency of the products, the test piece will be affixed to the bottom of my work vehicle for the winter season!
I do a lot of driving, in all conditions and in all seasons -  in central Canada - so a more "real-world" test I cannot imagine. The paints will be subjected to temperatures as low as minus 40C/40F, road dirt and grime, road salt mixtures and sand. As both sides of the panel were coated, we'll also get a good idea of exposed vs. protected metal surfaces.


This close-up shot is a little deceiving here but in reality both products looked very similar as they were drying - with similar raised bumps over the surface - which I'm assuming is due to the products outgassing while drying. 


 An hour after application,the two products had a similar sheen, with the POR15 drying slightly more matte (flat) and the Rust Bullet ever so slightly shinier.The differences were negligible though and both closely match the OEM black used by factories on frame and engine compartment components. Should a very specific color be required, both products can be topcoated with other products readily available.


Stay tuned for us attaching the test panel to my daily driver 
and updates throughout the next 12 months!

 TEST RESULTS AVAILABLE NOW! See them HERE!