fb icon

fb icon
Follow E-tek on fb!
Showing posts with label engine rebuild. Show all posts

February 5, 2021

Getting ready for primer....

After another long weekend of sanding, scraping, cleaning, repairs, removing final bits and pieces, we are getting very close to the milestone of a first high-build primer coat. 


Everything has been completely stripped, rust-treated and  rust-proofed. After primer we'll rust proof the inside of all panels with either Rust-Bullet or POR-15 products and spray a protective Dura-guard coating which decreases sound and vibration making for less sound transfer and a quieter ride.


Inside the cab we still have the heater and final dash panel to remove for paint and rebuild:


These knobs are being a MAJOR PITA!! They have a tiny hole on one side that obviously has a release mechanism inside, but I have yet to figure it out!! more research needed!


The roof panel has this discoloration that appears to be baked-though primer, not rust. None-the-less we'll sand it down, treat it with POR-15 and paint it to be sure it's right.


                     Teaching the next generation of car builder, much like my Dad taught me!


 Grille and undersides of hood sanded down to metal where required and rust-treated several times over - a level you'll never see done in a for-profit body-shop!


Even pieces like the trasn cover get scraped and treated  - that's QUALITY workmanship!  :)


Also, the interior kick-panel, which holds the gas pedal assembly, was rusted through on one side and needed a lot of work throughout. I cut and welded in a piece on one side, smoothed out the rest and we'll rust-board, then gravel guard the entire thing for durability.


The engine is also on the agenda as we get closer to paint. Time to assess all the parts, measure the bores, check the lash and top end and see if we can't run it up on the bench.


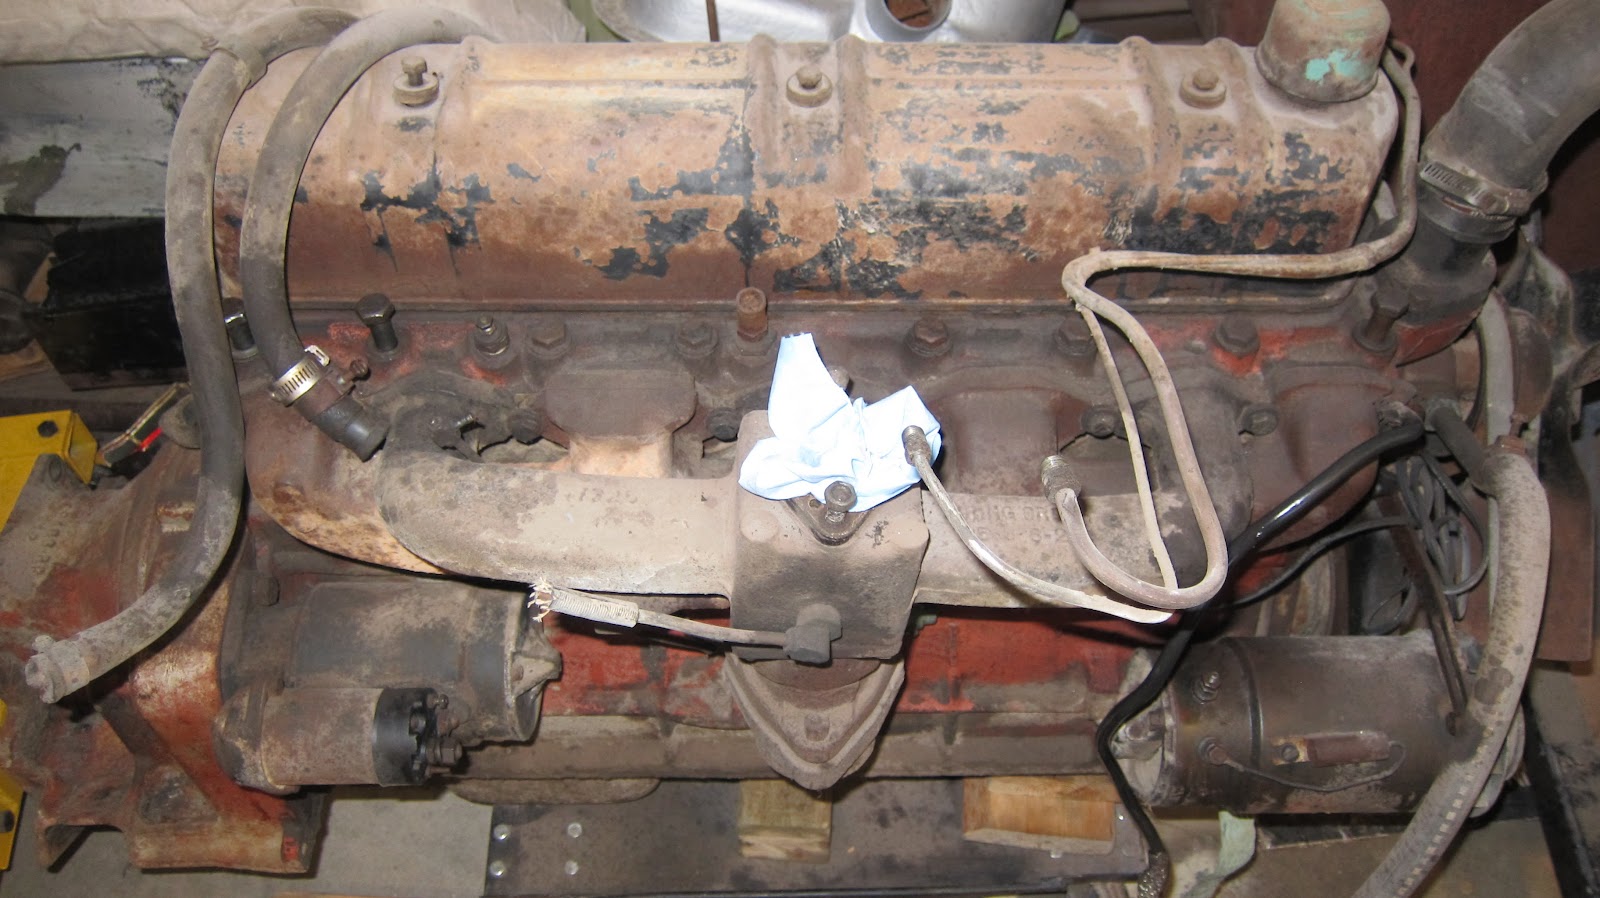
Unfortunately, I made this potentially problematic discovery as I was removing the carb... a missing frost plug. This could mean it had a freezing issue at some point in its past many years of sitting idle. Now the question becomes: still go ahead with the bench start and see what happens - or go straight to full disassembly to have the block magnafluxed. 


Or....pull the head off and Magnaflux the top end of the block - 
which is likely the best half-way measure at this point.

 Heater assembly was removed and will be gone-though, tested and detailed. It's these parts that make the entire project a show-stopper, inside and out!


After removing the heater core I sanded it down and disassembled it. I'll take the core in for a pressure test and then re-assemble it for paint.


Based on the shape of these duct-pipes, the heater hasn't done much good for a long while!


                                                              Stay tuned for more!

August 1, 2014

390 FE teardown - a TURBO mill for the Galaxie

This winter the E-tek Rod Shop will be a rarely seen "clean zone", meaning there will be no bodywork, sanding or painting going on and all the projects will either be in build-up phase (Camaro and 240Z), or clean-up and detailing phase (Porsche). So what better time to also tackle some of the mechanical projects I have in mind, in addition to putting together the projects that have - or will have -  fresh paint on them.

Two such mechanical projects are the flatead I have slated for the E-Rod  and the boosted 390 FE I have slated for the Galaxie. The key then will be in getting both mills ready to go the machinist. so that they\ll be back in the shop - ready to go together - before the snow flies.


390 FE teardown:  I bought this complete engine from a great guy whose name is Morris, who is also the SK modertator of the FordTruck.com site.

Overall, the engine looked reasonmably well-kept on the outside, with little evidence of leaks or exterior damage. It had spent a winter (or several) outside tho and in SK that can alwasy be an issue...so lets see what lies inside -


Above - little sludge insode the valve covers and a clean valve train was the first good signs.
       Below - all the parts removed looked healthy, with no visible wear marks or evidence of  heat damage.


 Above - though the parts were easily removed, the rotating assesmbly took somewhat more torque to move than normal
         Below - a ton of slack in the timing chain often signlals some obvious wear and likely high-milage


Below -  Most of the pistons where relatively free of carbon build up and the cylinder walls where smooth.  Some flash rust is evidence of moisture settling on the cylinder walls over years of storage, which would have caised the increase in rotating torque I saw ealier.


Below - bottom end looks clean as well, with previsuly numbered rod end caps,
 signifying at least one previous rebuild.


Once everything is off the block, the crank will be shipped off to my machinist, 
along with it's 30+ year older brother, the flathead, where it will undergo all the work deemed necessary to renew it for another term at the buisness end of a fine automobile!


Via www.E-tekRestorations.googlepages.com