But now that the leaves - and the eves - the yards and ALL THE REST is (mostly) done....it's time to get back to why we come here! Restoring cars!
Continuing with the metal work on the rear fenders, I gathered up the required tools, including the Oxy-Acetylene outfit, Mig welder, hammers, dolly's and a a few hand tools as needed:
First up was removing the last rusted fasteners - the "heat-wrench" making quick work of them.
In addition to the damage and rust that was evident, the fenders where stretched and twisted. I wanted to be sure they ended up fitting the bed-sides, so I first measured the attachment points, then made sure each side fender matched that measurement. One side was stretched, the other shortened - each needing a very opposite tactic to ensure they ended up at the 51" mark that matched the attachment points on the box sides.
For the fender that was stretched, I cut a piece of aircraft cable to length and\
welded it to the fender corners to keep the fender in shape while I did the needed repairs:
The other fender was pulled short, so I used the extension track-bar to
hold the fender corners in shape while I made the required repairs.
A couple rusted-out attachment points where repaired
by welding in pieces cut out from another set of fenders.
Additionally, I bodyworked several parts using old-school bump and file methods.
The metal file quickly shows the highs and lows, which where then worked with hammer and dolly
One fender was so badly damaged on one corner that
I had to stitch up some cracks and breaks before starting any shaping:
Once it was one-piece again, I was able to start shaping....
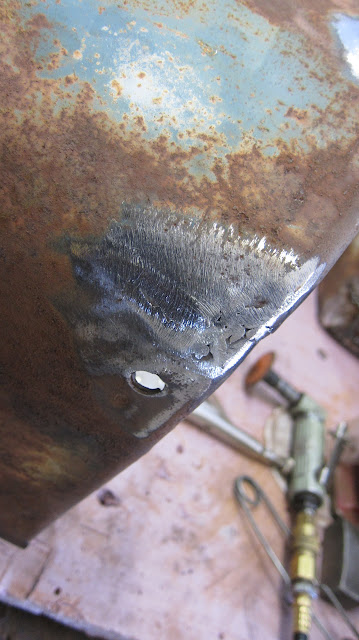
Some attachment holes where "mostly" there, so I was able to build them back with the Mig welder
With the fenders mostly done I'll turn my attention to the major work of the box floor tomorrow.


