fb icon

fb icon
Follow E-tek on fb!
Showing posts with label metal work. Show all posts

December 31, 2022

1964 Mercury COMET Caliente Convertible Restoration

Welcome to 2023!!  

I haven't been very active on this page in the last couple years - that's about to CHANGE!!


1964 MERCURY COMET Caliente 

COMPLETE RESTORATION

- Towed in -   


Even in the shop it looked OK!


Sweet interior and colors


Racked up she was a nice unit!


But good looks can hide a trail of destruction!

What's that in the REAR??


YT Video re-assembly series is underway!
https://youtu.be/GVwyjE1eN70


November 6, 2021

Closing in on 400 hours....


400 hours seems like a lot!

That's 10 work weeks. But if you say 2 and a half months, it doesn't seem that long. Thing is, restoring a vehicle is almost ALL labour. While a body shop would charge $100.00 per hour, which would be $40,000.00 to date, I charge half of that. Restoring vehicles and paying retail is cost prohibitive for most people, not to mention having way more into most vehicles than they can ever be worth when sold or insured. I'm happy to help though as I love my side job, love restoring great vehicles and always appreciate a great reason for restoring something for someone.

On the '56 International 4-by, the filler work is coming along. The box was by far the worst of it, but it now has a new floor, is reinforced to way more than factory standards, is completely rust free and getting straighter by the hour, as is the cab.

Filler work on right door. The side had entire bottom portion replaced with new metal -


Filler work on box - a minimum of fill was required due to so much work in metal finishing.


September 17, 2020

1956 IH 120 Series 4x4 restoration progress to date

 The truck is now 95% stripped to bare metal with 80% of the metal-work complete. A few rust patches to do on the cab, then we'll mock it all up and start the filer work, which will likely take up a couple hundred hours of labour....


December 20, 2015

1956 International Restoration 120 Series: the beautification process begins

The large body panels and shell were not sandblasted - due to the damage that can happen, so I carefully stripped the original paint form the areas needing repairs to start.


The top of the cab had a large dent that was never properly repaired, just filled.


Of course it's double-walled on the inside, which explains the lack of effort in the original  repair


Passenger lower door will have new metal spliced in - 


Let the SPARKS fly!


Under the cab the transfer case was still packed with a cement-like mud substance - which took nearly an hour to remove :(  Below you can see the area the sand- blaster couldn't penetrate.


November 7, 2015

1956 International Harvester Pick-Up: Metal work restoration

For anyone who has wonderd why I haven't posted anyhting from the E-tek Rod Shop as of late, it not because I haven't been busy!  Fall is ALWAYS busy!


But now that the leaves - and the eves - the yards and ALL THE REST is (mostly) done....it's time to get back to why we come here! Restoring cars!


Continuing with the metal work on the rear fenders, I gathered up the required tools, including the Oxy-Acetylene outfit, Mig welder, hammers, dolly's and a a few hand tools as needed:


First up was removing the last rusted fasteners - the "heat-wrench" making quick work of them.


In addition to the damage and rust that was evident, the fenders where stretched and twisted. I wanted to be sure they ended up fitting the bed-sides, so I first measured the attachment points, then made sure each side fender matched that measurement. One side was stretched, the other shortened - each needing a very opposite tactic to ensure they ended up at the 51" mark that matched the attachment points on the box sides.


For the fender that was stretched, I cut a piece of aircraft cable to length and\
 welded it to the fender corners to keep the fender in shape while I did the needed repairs:


The other fender was pulled short, so I used the extension track-bar to 
hold the fender corners in shape while I made the required repairs.


A couple rusted-out attachment points where repaired
 by welding in pieces cut out from another set of fenders.


Additionally, I bodyworked several parts using old-school bump and file methods.


The metal file quickly shows the highs and lows, which where then worked with hammer and dolly


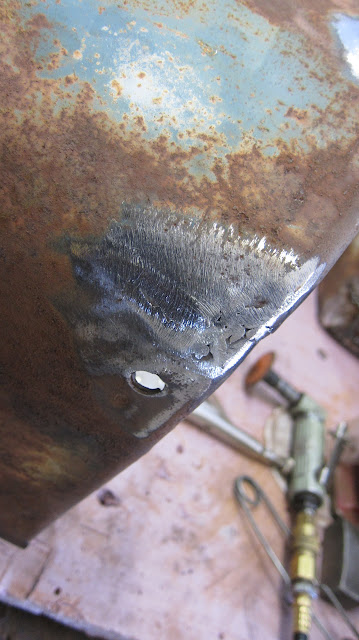
One fender was so badly damaged on one corner that 
 I had to stitch up some cracks and  breaks before starting any shaping:


Once it was one-piece again, I was able to start shaping....


 Some attachment holes where "mostly" there, so I was able to build them back with the Mig welder


With the fenders mostly done I'll turn my attention to the major work of the box floor tomorrow.


October 9, 2015

1956 International Restoration 120 Series: Metal Working Bed and fenders

The next several weeks - and hundred-odd man-hours - will be dedicated to getting the metal close to the shape it should be in, attempting to reverse the many years of abuse, damage and rust.

The bed is the worst part by far. We purchased a new floor section, but just cutting out the old and fitting/welding in the new will be a major undertaking.


Besides the rust, the bed was pierced by the shocks when the truck was overloaded with frozen Pike and Pickerel fish, caught by so many ice-fishermen in an exceptionally good year.


But the truck was used for much more than hauling fish....


Here I'm using the impact chisel to remove some hardened cement that was lodged inside the rear tailgate channel....


The rear fenders will need a considerable amount of work as well - and these are the GOOD pair that came with a "better" box the owners brought in to replace the unusable original pieces!


Just as a teaser.....this is the same fender-corner that was shown "folded over" in a previous post. Little by little, we'll get there.