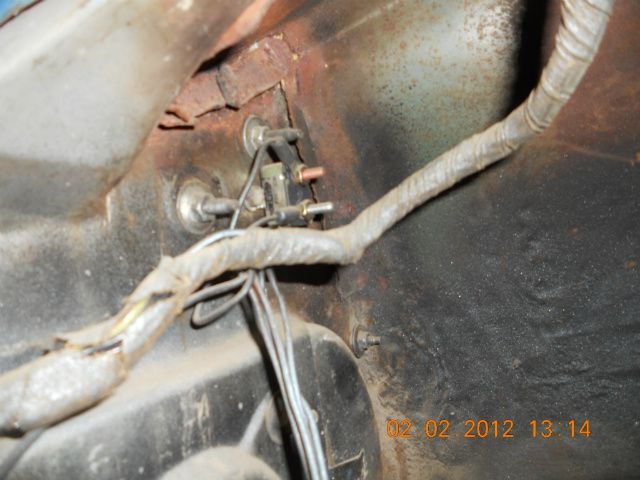
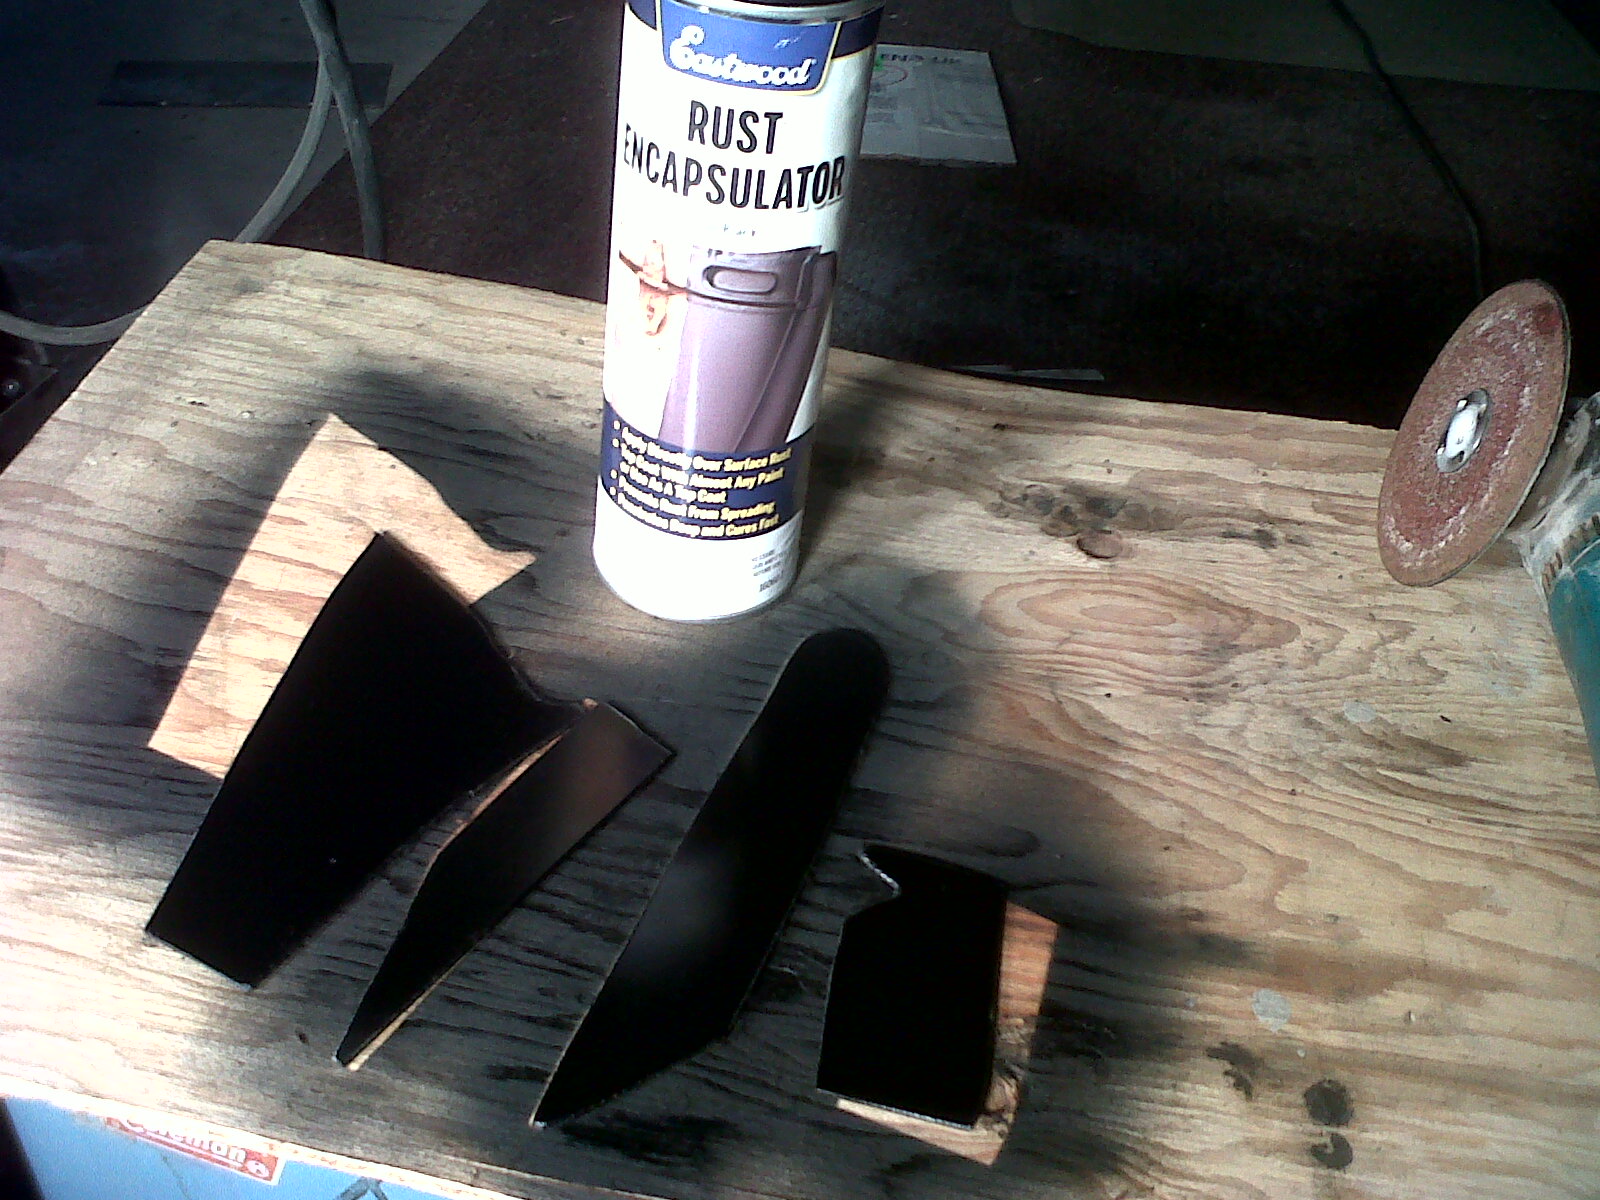
Finished up the Left Rear Torque Box and put some RustBullet on it. I may put a skiff of fiberglass over the rail repair - just for aesthetics, but that's about all it needs. Can't imagine too many people are ever gonna see the inside of this rear frame rail - but it's the way I roll. ;)
Also today, the '56 Chevrolet Pickup left today on the flat bed. Drove it out of the shop and everything seemed to be working, but I'll get it back in the spring to do a few things, not the least of which is an antifreeze leak that started at the heater core as I drove it up onto the deck - ARRG!
The operator was about to winch it up onto the deck, but I had enough confidence in it to take a run at it and hold the brakes while he evened it out. First run didn't take as the rear tires spun in the ice - so, against my own better judgement I backed it up about 20 feet and took a run at it! Up she went and thank GOD the brakes worked! LOL!!
She Shore looked PRETTY in the sunlight - didn't She?! Good-bye sweetheart....but we'll have her back in the spring for road testing, a few final things that I'm sure will come up...not the least of which will be an antifreeze leak I saw at the heater box as I drove it up the ramp. Although it's been running quite a bit in the shop, it hadn't really produced any pressure until just now. Figures.
Don't forget how it showed up:
NB - Just want to say that this is the "template" I want all my future restorations (for others) to take. The family was into it, the owner was thrilled with it and visited often, the Son and Son-in-Law came out to help a few times, and the bills where paid all the way along! I actually spent $200 and 18 hours of my own after the last payment and didn't even care - because the entire project was enjoyable for me too.
Good luck to the Crozon's and their "re-NEWed" truck - enjoy the attention it brings!
Don't forget to check out the website at www.E-tekRestorations.com !
February 11, 2012
February 10, 2012
Do you REALLY think you can save him Doc??
It doesn't look good.....but I'll try my best - with these hands and Gods will.....
We have the technology to make it faster, better, stronger than it was before.
You MUST SAVE the patient doctor!
In some spots, I like to drill holes in order to spot weld a new piece to a repair panel:
Like this:
Damn it Jim - I'm a mechanic, not a doctor!
IT's ALIVE!! I little make-up and.....this pig will LIVE!!!
One more and we're done!! Then I can get to the fun stuff - dual exhaust and flame throwers!!
Don't forget to check out the website at www.E-tekRestorations.com !
Special thanks to www.Eastwood.com www.RustBullet and www.CarCraft.com !
We have the technology to make it faster, better, stronger than it was before.
You MUST SAVE the patient doctor!
In some spots, I like to drill holes in order to spot weld a new piece to a repair panel:
Like this:
Damn it Jim - I'm a mechanic, not a doctor!
IT's ALIVE!! I little make-up and.....this pig will LIVE!!!
One more and we're done!! Then I can get to the fun stuff - dual exhaust and flame throwers!!
Don't forget to check out the website at www.E-tekRestorations.com !
Special thanks to www.Eastwood.com www.RustBullet and www.CarCraft.com !
February 9, 2012
After getting those control arms out, the next step was to remove the bushings. Ironically, I was just saying that a press was one tool I've never had much use for and hence, do not have. This would have been a good excuse to buy - or better make - one, but then I notices how the stand I made for the brake would do the job perfectly - and mean I wouldn't have to try and squeeze another piece of equipment into my already CROWDED shop!
They came out very easily!
Now that they're out of the way, I can do the repairs to the rear frame rails:


Here's just some of what was hiding inside. All in all it about 10X that came out....

I've ordered new bushings from RockAuto.com, Front and Rear Sway Bars with poly bushings from PST, shocks, brakes, strut rod bushings and some seals and stuff for the top-side from Dearborn, not to mention headers and dual 2 1/2" exhaust from SUMMIT.


Here's just some of what was hiding inside. All in all it about 10X that came out....

I've ordered new bushings from RockAuto.com, Front and Rear Sway Bars with poly bushings from PST, shocks, brakes, strut rod bushings and some seals and stuff for the top-side from Dearborn, not to mention headers and dual 2 1/2" exhaust from SUMMIT.
Of course the left rear was MUCH worse than It looked. I cut off the bottom and then saw that I had to also cut at least 1/3 up each side:
Here is is with a little more cut out. I like to cut a bit at a time, in order to make templates from the original pieces. Then I remove that section and make the inner accessible to make templates for the inner pieces.
Once all the parts that are being replaced are cut out, I soaked the rest down in a Phosphoric acid solution. This will make the remaining surface and any hidden rust inert and make for a better surface to both weld to and apply a rust paint like RUST BULLET to.
Here are the template pieces made from scrap paper and laid out on the sheet of 14 gauge steel plate:
Stay tuned for fitting, welding and finishing!
Don't forget to check out the website at www.E-tekRestorations.com ! Special thanks to www.Eastwood.com, www.RustBullet.com and www.CarCraft.com !
February 5, 2012
A break in the action.
Since I took today (Sunday) off, I thought I'd update y'all on my 46 MERC. In this mild winter we;ve been having, I've left it outside and have even started it a couple times! I have a thermostatically-controlled blocks-heater (magnetic) and battery charger on it. It was out front for a few months with Christmas lights on it - neighbours LOVED it. I just moved it to the back.
As you can see I had the doors lettered this spring - whole nuther story there.... and it's still getting used as it should be! Was going to do the lettering myself - and as usual - I should have! But decided to take it to an old-time sign painter, told him what I wanted - even (tried to ) confirm he knew what I meant....
Insread, he just thinned out the paint a little and painted away! When I got it home I burnished it best I could, but it was dry - and tough! NExt spring I'll rub it out some more.
Here's me taking some engine blocks to the recyclers. They sucked them out of the truck with the giant magnet!
I like this shot - 2 FORD products, 50+ years apart. They don't make 'em like they used to...GOOD or BAD?? Less style, better made!
This spring the Old Man is getting new tires - full WhiteWalls - and I'll paint the rims a cream color. I've been considering finally switching over to 12V as well. As much as I like the kitchiness and old-school flavour of 6V, it sometimes strands me as it turns over soooo slowly. Everything else remains the same.
Don't forget to check out the website at www.E-tekRestorations.com !
Special thanks: www.Eastwood.com www.CarCraft.com www.RustBullet.com
As you can see I had the doors lettered this spring - whole nuther story there.... and it's still getting used as it should be! Was going to do the lettering myself - and as usual - I should have! But decided to take it to an old-time sign painter, told him what I wanted - even (tried to ) confirm he knew what I meant....
Insread, he just thinned out the paint a little and painted away! When I got it home I burnished it best I could, but it was dry - and tough! NExt spring I'll rub it out some more.
Here's me taking some engine blocks to the recyclers. They sucked them out of the truck with the giant magnet!
I like this shot - 2 FORD products, 50+ years apart. They don't make 'em like they used to...GOOD or BAD?? Less style, better made!
This spring the Old Man is getting new tires - full WhiteWalls - and I'll paint the rims a cream color. I've been considering finally switching over to 12V as well. As much as I like the kitchiness and old-school flavour of 6V, it sometimes strands me as it turns over soooo slowly. Everything else remains the same.
Don't forget to check out the website at www.E-tekRestorations.com !
Special thanks: www.Eastwood.com www.CarCraft.com www.RustBullet.com
February 4, 2012
Before the Cougar comes in I'm trying to finish up my Galaxie. Every year it's the same - I want to go a bunch of stuff, but other projects get all my attention - and I want to drive the Gal!!
Today I removed the rear lower control arms - of course what should take an hour, took three! The bolts where seized through the bushings and had to be coerced out....
First up, getting the bolts apart. I used my half inch ratchet and a 3 foot extension tube and barely got the front ones out. On the rear ones, the nut came off, but not the bolt.
Screw it, lets cut 'em off!
To get these gall-darned control arms out I had to use every high-persuasion tool I have! The bolts where seized, so I cut the ends off, but the brackets wouldn't spread enough to go over the stubs still left, so I had to cut inside the brackets (which you can see me doing above).
They finally came out, but not unscathed. I still need to get the seized bushings out too! Believe it or not, I've rarely ever needed a press, so here's a great excuse to build one - which I would love to do - if it weren't for the day it would take that I could be doing something "more productive". Of course I like fabricating stuff so much I'll likely buy the metal Monday and get 'er made one night next week!
Now that they're out of the way, I can do the repairs to the frame rails. This is where the rails go up and over the rear end - so a very important junction, taking a lot of torque from holding up the entire rear end - it HAS to be strong. Likely, once I make the basic repair, I'll add plates to either side to add even more strength and rigidity to the entire rear section.
Here's just some of what was hiding inside. It's what causes all that rust!

This baby is going to be a completely different animal after all this work: I've ordered new bushings from Rock Auto, Front and Rear Sway Bars with poly bushings from PST, shocks, brakes, strut rod bushings (as well as some seals and stuff for the top-side) from Dearborn, not to mention headers and dual 2 1/2" exhaust and full-flow mufflers from SUMMIT RACING (along with my flame-thrower idea!), so it's going to be an AWESOME summer for "OUR GAL"!!!!
I know a lot goes on here at E-tek, so tell me if I'm moving too fast!! HAHa!!:lol:
Don't forget to check out the website at www.E-tekRestorations.com!
Special thanks to www.RUSTBULLET.com and www.CarCraft.com!
Today I removed the rear lower control arms - of course what should take an hour, took three! The bolts where seized through the bushings and had to be coerced out....
First up, getting the bolts apart. I used my half inch ratchet and a 3 foot extension tube and barely got the front ones out. On the rear ones, the nut came off, but not the bolt.
Screw it, lets cut 'em off!
To get these gall-darned control arms out I had to use every high-persuasion tool I have! The bolts where seized, so I cut the ends off, but the brackets wouldn't spread enough to go over the stubs still left, so I had to cut inside the brackets (which you can see me doing above). After that, they STILL wouldn't budge, so I heated up the brackets and tried to pry them apart and BEAT them out with the sledge! With all that beating and prying I had the lift wobbling pretty good a couple times - scary!
They finally came out, but not unscathed. I still need to get the seized bushings out too! Believe it or not, I've rarely ever needed a press, so here's a great excuse to build one - which I would love to do - if it weren't for the day it would take that I could be doing something "more productive". Of course I like fabricating stuff so much I'll likely buy the metal Monday and get 'er made one night next week!
Now that they're out of the way, I can do the repairs to the frame rails. This is where the rails go up and over the rear end - so a very important junction, taking a lot of torque from holding up the entire rear end - it HAS to be strong. Likely, once I make the basic repair, I'll add plates to either side to add even more strength and rigidity to the entire rear section.
Here's just some of what was hiding inside. It's what causes all that rust!

This baby is going to be a completely different animal after all this work: I've ordered new bushings from Rock Auto, Front and Rear Sway Bars with poly bushings from PST, shocks, brakes, strut rod bushings (as well as some seals and stuff for the top-side) from Dearborn, not to mention headers and dual 2 1/2" exhaust and full-flow mufflers from SUMMIT RACING (along with my flame-thrower idea!), so it's going to be an AWESOME summer for "OUR GAL"!!!!
I know a lot goes on here at E-tek, so tell me if I'm moving too fast!! HAHa!!:lol:
Don't forget to check out the website at www.E-tekRestorations.com!
Special thanks to www.RUSTBULLET.com and www.CarCraft.com!
Here's a few more of the next E-tek Restoration project.
May be the "nicest" start to a job I've ever had!
| Add caption |
Looks so good.....but here's some of the work required:
Can you spot the CRAPPY bodywork?
It's not that you wouldn't have a few little wrinkles on the back side of a repaired panel, but my standards are much higher than this! With much more hammer and dolly and much less filler, there would have been fewer wrinkles - which I then would have finished on this side (the inside), so it would look like there was never a repair made.
In all it'll need front floors and quarter panels, plus whatever pops up once it's here and gone through. The owner is stripping it down and it'll be painted at BridgeCity Collision, owned by a very long-in-the-tooth restoration specialist named Corky. He has done - and owns - many wicked rides and is a perfectionist - which makes us the perfect team!
Don't forget to check out the website at www.E-tekRestorations.com.
Special thanks to www.RUSTBULLET.com and www.CarCraft.com.
February 3, 2012
Anyone who's ever done a restoration - or a renovation - knows how much of a pain it is to strip treatments off after years and years of exposure. Rubberized undercoating is the back-yard restorers worse job and there are as many methods to aid in the removal as there are pissed off guys doing it!
A few weeks back I picked up one of these newer tools that vibrate back and forth quickly and the different attachments can cut wood, remove grout and strip paint. I decided to try it on the undercoating that needs to be removed on the Datsun and WOW! The tool easily stripped off any parts that where at all soft and even made short work of the parts that where rock hard after 40+ years.
The blade can even be re-sharpened on the grinder.
I highly recommend this to anyone having to strip undercoating!
A few final (I know I've said that before) parts arrived for the 1956 Chev Truck that is slated to go out the door next week. It now has a new upper rad hose and spring clamps, as well as new parking brake cables.
The cables where a little easier to replace than I thought they might be - not even necessitating the removal of the the pads and springs. That almost never happens!
After those fun tasks, it was back to the rust work on the Galaxie frame. Someone on GarageJournal said I was using CAD - meaning Cardboard Aided Design - in making templates for the pieces. I thought it very clever.
Prior to welding them in, I again treated them with Eastwood's Rust Encapsulator. One thing I've noticed about this product is how it barely burns off with MIG welding. After welding up the front piece, I could see the reverse side and it wasn't burned at all, even right at the weld seem.
I've found that moving the grinder to my work area - mounted on a stand - makes it easy to do all the fine grinding required to fit the parts prior to weldingHere's the area after the first pass and some grinding of the welds. Being 14 gauge steel, I used a higher setting on the MIG welded than usual. It made for a very strong final structure.
A couple touch-ups with the MIG and grinders and it was ready for some Rust Bullet paint. This stuff if now my new favourite in terms of application and usage. It goes on easily, self levels nicely and looks great. Unlike my previous favourite, POR15, it also has UV protection built in, so although you CAN topcoat, you don't need to. Long term testing is under way here at E-tek and we'll see how it performs over the course of a mean Saskatchewan winter!
Ta da.
Don't forget to check out the website at www.E-tekRestorations.com ! Special thanks to www.Eastwood.com and www.CarCraft.com !
Subscribe to:
Posts (Atom)