fb icon

fb icon
Follow E-tek on fb!

September 3, 2020

Porsche Diversions Porsche Diversions

After pounding out nearly 100 hours straight on the IH box - it was time for some alternative entertainment....of the German kind:

The E-tek Porsche Boxster is a completely different ride than is the '67 Galaxie, the 46 Merc, or the 71 Datsun. It's fast, smooth, classy and a completely different experience than anything else I own. But over the summer, the German super-sport had begun to fail. Idle started to get choppy. It began to lurch and then, last week, warm-up started taking longer and idle was almost non-existent.

Being a new, sophisticated, EFI model, many people would shy away from trying their hand at trying to fix it's woes. But in reality, the newer machinery, with it's complex computer systems and multitude of sensors, is actually quite easy for the do-it-yourselfer to remedy. Most issues are due to either dirty - or damaged  - sensors and the ODB system points you in the general direction. All you have to do is plug in an ODB2 reader, Google the codes and then Google some forums to get the most likely answers to the issue.

In my case, my $50 ODB2 reader showed 3 codes: P0102, P1126 and P0507. Plugging them all into Google led me to the Pelican Parts (http://www.pelicanparts.com) technical page. Pelican Parts is a European specific repair shop online presence, with parts house and information center run by some of the nicest guys I've ever met - online.


Porsche Technical Articles
Welcome to our Porsche technical articles section. Technical Article Directory orBulletin Board.


After reading some of the tech articles and conversing online with one of their tech experts, I learn that P0102 is the Mass Airflow Circuit, P1126 an O2 sensor code and P0507 an Idle Air Control System error code. Translation?  The MAF sensor and throttle body needed to be cleaned!

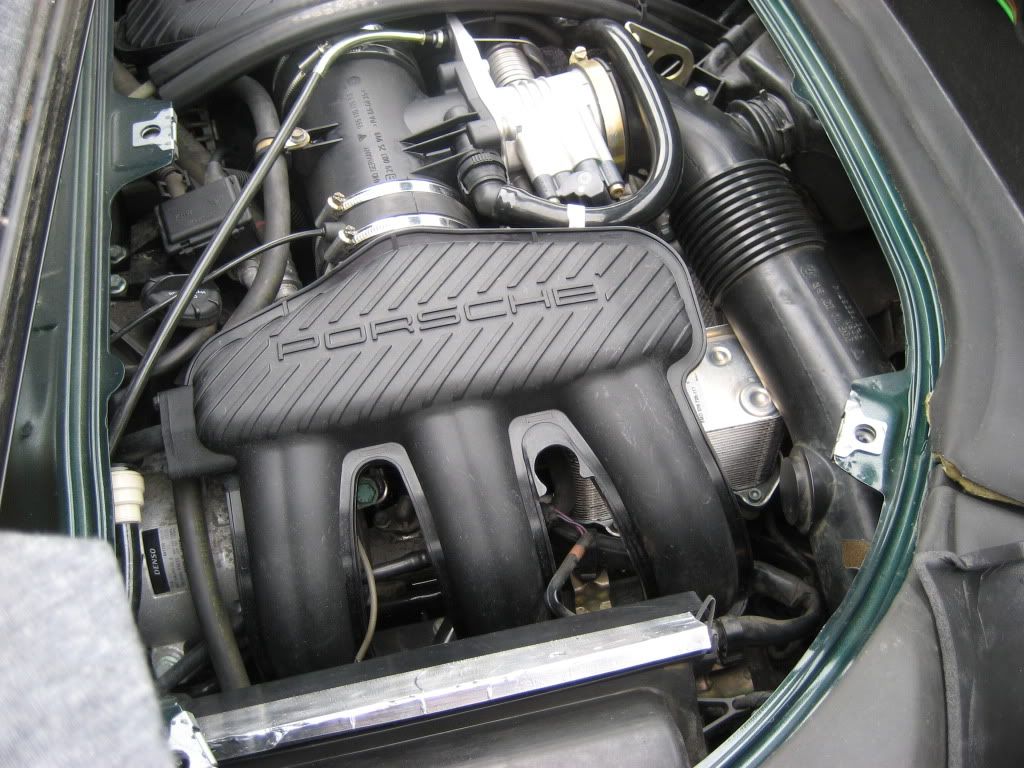
So off I went into the shop, grabbed a can of Thottlebody cleaner and one specifically for MAF sensors and went to work. After putting the Boxster into engine-access mode (roof half up, engine covers removed), I removed both items from the engine and proceeded to clean them up:


MAF sensor location: Both the MAF and TB are fairly easily accessible, if you don't mind leaning over the ass-end of your boxster for several hours....


 MAF sensor removal: Oddly, Porsche decided to use T20 Security Torx screws on it, which is great because I got to use a tool that until this point, laid dormant in my tool box!


Security Torx have a little 'nipple' in the middle, so a special driver bit is required:


Once the MAF and TB were out, they got spray-cleaned with specific cleaners available at any auto-parts of general goods store. I got mine at Ukrainian Tire.

Image result for Porsche MAF sensor

Good MAF photo with insets of wire connection, T20 Secure-bit and a can of CRC's MAF cleaner. (From Pelican Parts)


You can see how this might affect performance.... The dirt and intake crud was probably affecting how much the throttle plate could move - and especially close - causing the "Idle Air Control" error.


Half-cleaned:


One side cleaned:


Other side cleaned:


Cleaned MAF:
Image result for Porsche MAF sensor


Once everything was re-installed, I cleaned up the engine compartment and - with fingers crossed - started it up. And WHAT A DIFFERENCE!  Every issue I was experiencing prior was gone. With the ODB2 Code Reader I reset all the codes and took it for a test drive. Driveability was back to normal and NONE of the codes returned. Who said Porsche's cars were expensive and hard to work on? In my book, THAT'S a cheap fix!

Image result for porsche boxster engine compartment

So, with the drivers back in order, I can enjoy what's left of summer cruising while continuing the restorations on the IH and the 240Z. I LOVE cars.


August 28, 2016

1956 International 120 - The Complete restoration

                                              Via www.E-tekRestorations.googlepages.com

The box of any truck takes a beating - hauling loads, trying stuff down, trhowing stuff into, onto and over the sides....and this International's box was no different. It led a hard life - the rails are dented front to back and even crushed in one spot, The front end is bowed out from years of having things thrown into it. The tailgate is thin from rust, broken in spots and out of shape. So why n6t f5nd a better one and sawp it out? Believe me, I looked! Anything you can find is even worse off - and since I was changing out the floor anyways, the largest part was done.....or so I hoped...


Working the sides to be close enough only to need a skiff of filler was our goal:


A couple last rusted-though areas tended to with new metal:


Metal-finishing the sides takes a lot of work, but saves on a lot of filler....


Starting to look like a truck box again! 
Soon it'll look like a NEW truck box.


Check out much more restoration information, builds, how-to, 
products and  more at https://sites.google.com/site/edanneberg/


July 8, 2016

International Harvest 120 Series Rust work - July 2016

BACK AT IT!!

After a somewhat extended absence due to a little illness (mostly lazy-itis), we're back in the E-tek Shop making sweet sweet metal-magic! Follow along while we get this beautiful 56 International truck back to its glory days:


^ With the box out of the way, the frame and cab where cleaned up again and the paint, mud and dirt stripping continued. Only a couple small patches left and the cab will be ready for filler and paint prep.

One of these final rust spots was cut out, a cardboard template made to fit:and new metal made to replace it:....


^ Cardboard template


^ Cut, cut, cut...


^ Transferred to 18G sheet steel...


^ The same was done for an inner piece, just requiring a little
 more finesse and metal shaping....


^ And with the inner piece inserted, the top piece is finalized to fit.

Back on the box, the back edges where metal-finished (no filler) 
and the underside was welded together with the sides...


^ These holes had to go


^ And so they did. Note the partially metal-finished section on the left...


 ^The new floor will MAKE the truck!


February 21, 2016

International Harvester 120 Series: Box floor

 The prep time in order to get the box floor into the shape required to be welded to the outer structure is significant - and today was devoted to the things no-one ever sees. Measure - edges trimmed, floor shaved, box sides prepped, fitment. Measure again.  Welding coming next.


www.E-tekRestorations.blogspot.com

February 9, 2016

Ford Flathead side-mount engine stand

Brought to you by  www.E-tekRestorations.googlepages.com 

The little Warn Winch comes in handy in so many applications:


To access the Flatty in most angles, I fabricated a side mount, bolted it to the exhausts mounting holes on on side of the flatty and then to the engine stand:


Makes for an odd orientation, but it's all very accessible:

1956 International 4x4: Metal work and box floors

Brought to you by:  www.E-tekRestorations.googlepages.com 

With the cab corner and door bottoms fabbed and shaped
 - and the inners prepped and solid - it was time to weld!


Once it's welded solid, the wleds are ground down...


The floor for the box was up next. The closest we could come was this full-size GM floor.
 With 8" cut off each corner, it should drop right in


Perfect cuts!


Should drop right in!

February 1, 2016

The E-rod is coming along....

                      Brought to you by:  www.E-tekRestorations.googlepages.com


Although it looks like not much has been accomplished, this is the stage whereby all the parts and pieces are mocked up, tried and tested, fitted and re-fitted.


The front suspension  has a strong cross-member  to hold it steady 
and most of the original pieces are still here:


On the rear, I'll mock it all up then remove the original pumpkin  and switch out the rear-end for something more robust - perhaps from a mid-40's F1 truck.