fb icon

fb icon
Follow E-tek on fb!

November 17, 2012

Hood work.....


The 40 Ford's hood is very original. Likely painted only once - and perhaps not completely - maybe just in the repaired spots such as where the latch plate was bolted to the hoods edge as shown below. 

I attached the latch plate to be sure everything lined up before I formed the other two ends and welded them in. It's pretty close, which at least shows us that the hood is somewhat even, side to side - not pushed over or buckled anywhere.


Having not been re-painted, one can see there's a lot of deep surface rust that needs sandblasting.


The hinges will need to be straightened, plus new rivets installed to tighten them up:


Here you can see a crack was welded at one of the stress points.
 On Saturdays, I have decided to spend an hour or two on my own stuff, including at getting some of the several engines I have sitting on stands.


Don't forget to check out my website at 
www.E-tekRestorations.com !

November 16, 2012

From wiring to metalwork


Test-fit the Headlight buckets and re-wired them for the single sealed beams and combined park/marker lights:


Left the pigtails off, ready to be connected after paint:


Hot rods require a completely different process than restorations. When I do a restoration, I pretty much know that everything will go back together where - and how - it should, With hot rods, you basically have to build it twice (or more) - once to get everything to fit and work, then you disassemble it all for paint and then rebuild it again to make it pretty!

Did some reading on these hoods and found that the latch plate causes a lot of issues with the hood - both in alignment and damage done due to the repeated flexing. My plan to strengthen both sides is to double-up both the hood edge and the lock plate mounting tab areas:

 This is where the hoods edge had cracked. I welded it up - inside and out - and will metal finish it after I welded a second layer of metal along the bottom lip.


Below is the latch panel. You can see it's bolted right at the very (thin) edges.
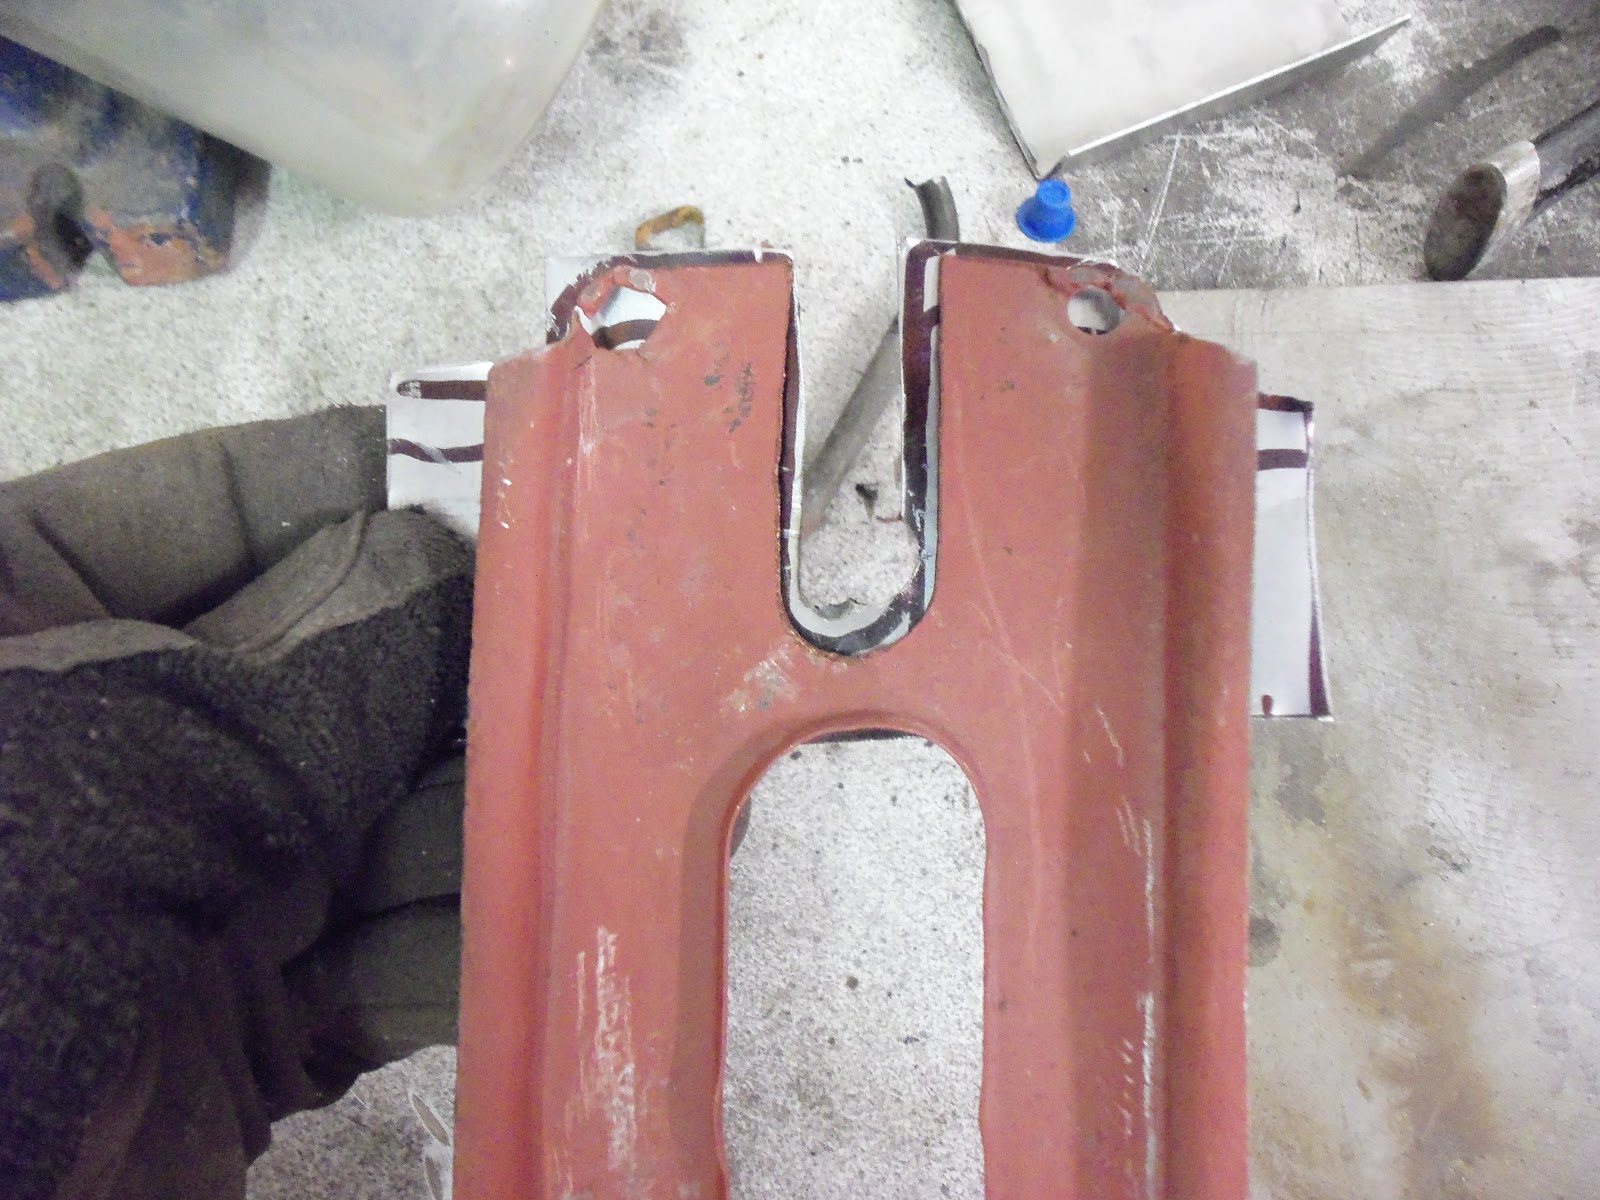
 Here you can see the mounting holes on the latch panel. Not a lot of strength there.
 I first flattened the areas that had been bent out of shape from where the bolts attach it to the hood.
 Then I fabricated a piece to be welded to the original, doubling up the weak area. Similar pieces will be make for each corner.


This electric shear might be the best metal tool I've ever owned - easy peasy!


Now that it's trimmed to shape I'll clean up the edges, weld it to the top-side of the original panel and it'll be completely hidden. Should add a lot off strength to problem area.


November 15, 2012

Parts painting booth

Whether you restore an entire car - or are rebuilding a carb, lawnmower, old tools or furniture - at some point you'll have some painting to do. From a few bolts to a bunch of parts from an assembly, you'll want to have a dedicated spot to paint them - and there's a variety of reasons to do so.

Firstly, you want the parts to remain clean for painting. There's nothing worse than meticulously preparing them only to have dust and dirt particles in the finished product. Next to keeping the parts clean, it's nice to keep you shop clean as well. Painting creates overspray, which ruins floors, tools, as well as other parts and projects close by (and sometimes far away!).

Something I've noticed many home (and even professional) restorers ignore are painting and baking temperatures. Higher temperatures are critical to proper painting and curing. Paint flows better, dries faster and flashes-off more completely when above "room" temperature. Most importantly is that the parts, paint and ambient air is at least 20C/72F, but by raising the temperatures even further - into the mid 30'sC (100-120F) -  you'll get far superior results: better flow, gloss and durability.

My current projects are not at the stage where I need a dedicated parts booth, so to save space I have it disassembled and stored in the corner of the shop.  Since I like to do things right, I decided to take the 10 minutes it would take to put together the pieces from the stored parts. The added heat in a cool shop,the ability to contain the overspray and keep the parts clean was worth it. You can see I also warmed the paint by setting it in front of the space heater for about 10 minutes.


Everything was first coated with an etching primer to maximize adhesion, then a mist coat of paint was followed with 3 heavier coats for coverage and flow. To some they are "just" headlight pots, but everything in the E-tek shop gets the same top-end  treatment!


After all was painted I covered it up with a thick sheet to maintain the temperatures and keep out any dust while the parts cured overnight.


Next up were the oil cooler lines from the transmission. A reducer was used to get the Ford lines to fit the aftermarket rad:


You may recall that the lines where cut in our last 'episode". Here I bolted them up to mark the cuts, then cut them to size and connected them temporarily (for run up) with 3/8 inch rubber hose. Permanent hydraulic hoses with crimped fittings will be made up with the AC fittings.


Lastly today I ran the positive wire up through the floor and hooked up a side-post battery.
 Being sealed it won't require a vent, but will be "boxed" before going to the upholster shop.


November 11, 2012

Owner lends a hand

 At certain points in the building of a rod, you really need the owner/driver to be on hand - yet we often hear how cars languish in shops for years on end without so much as a call and with little or no consultation between owner and technician. There's seat height, leg room length, pedal and steering wheel placement, console shape and location of the many components and much more. As well, most of the cars and rods I do are owned by those interested in doing some of the work themselves, so along the way they sometimes come over to the E-tek Shop to get their hands dirty, work with me on style and fitment and generally enjoy parts of the process. Such was the case today.


As we were discussing various parts of the built, the owner noted that I had the AC and tranny cooler lines mixed up (not sure what I was thinking there!). The tranny cooler lines from the 5.0L's transmission must have connected to a side-mounted cooler in the original "donor" vehicle and they lined up perfectly with the AC cooler lines on this rad, so I was under the impression that was where the connection was to be made. These were going to be connected by a Rad/AC shop off-site, but with this realization, we were able to cut and bend the tranny cooler lines and now - with some reduction fittings and a couple lengths of hose - I'll be able to get them connected for the initial run-up. The AC cooler (crimped) lines and charge can be done much later.


Also got some metal work done today on the hood in order to bolt up the latch panel. What I'll do this time is add a long piece to reinforce the edge where it attaches so as to stop this from occurring again. The edge obviously moved every time the hood was opened/closed (and maybe even while driving), causing the stress fracture.


Dismantled the headlight pots for sandblasting:


Lots more to come - hope you can come back weekly and join us!