fb icon

fb icon
Follow E-tek on fb!

September 10, 2021

1956 International Harvester S120 re-assembly


With the truck painted inside and out (and partially color sanded), it's finally time to tackle the re-assembly of all the bits and pieces. Although I'm still waiting on the rebuilt engine, re-rimmed wheels  and tires and re-upholstered seat set, I can get to all those peripheral parts in the interior, a well as the lighting, electrical, door glass and chrome. This is the reward for all those hours welding, hammering, sanding and sanding...and sanding....


Every itme going back is prepped and coated in either POR15 Semi-gloss, or Eastwood's Chassis Black which is a very Gloss Black.


The vent glass frame was painted in chassis black. Very nice stuff it is.


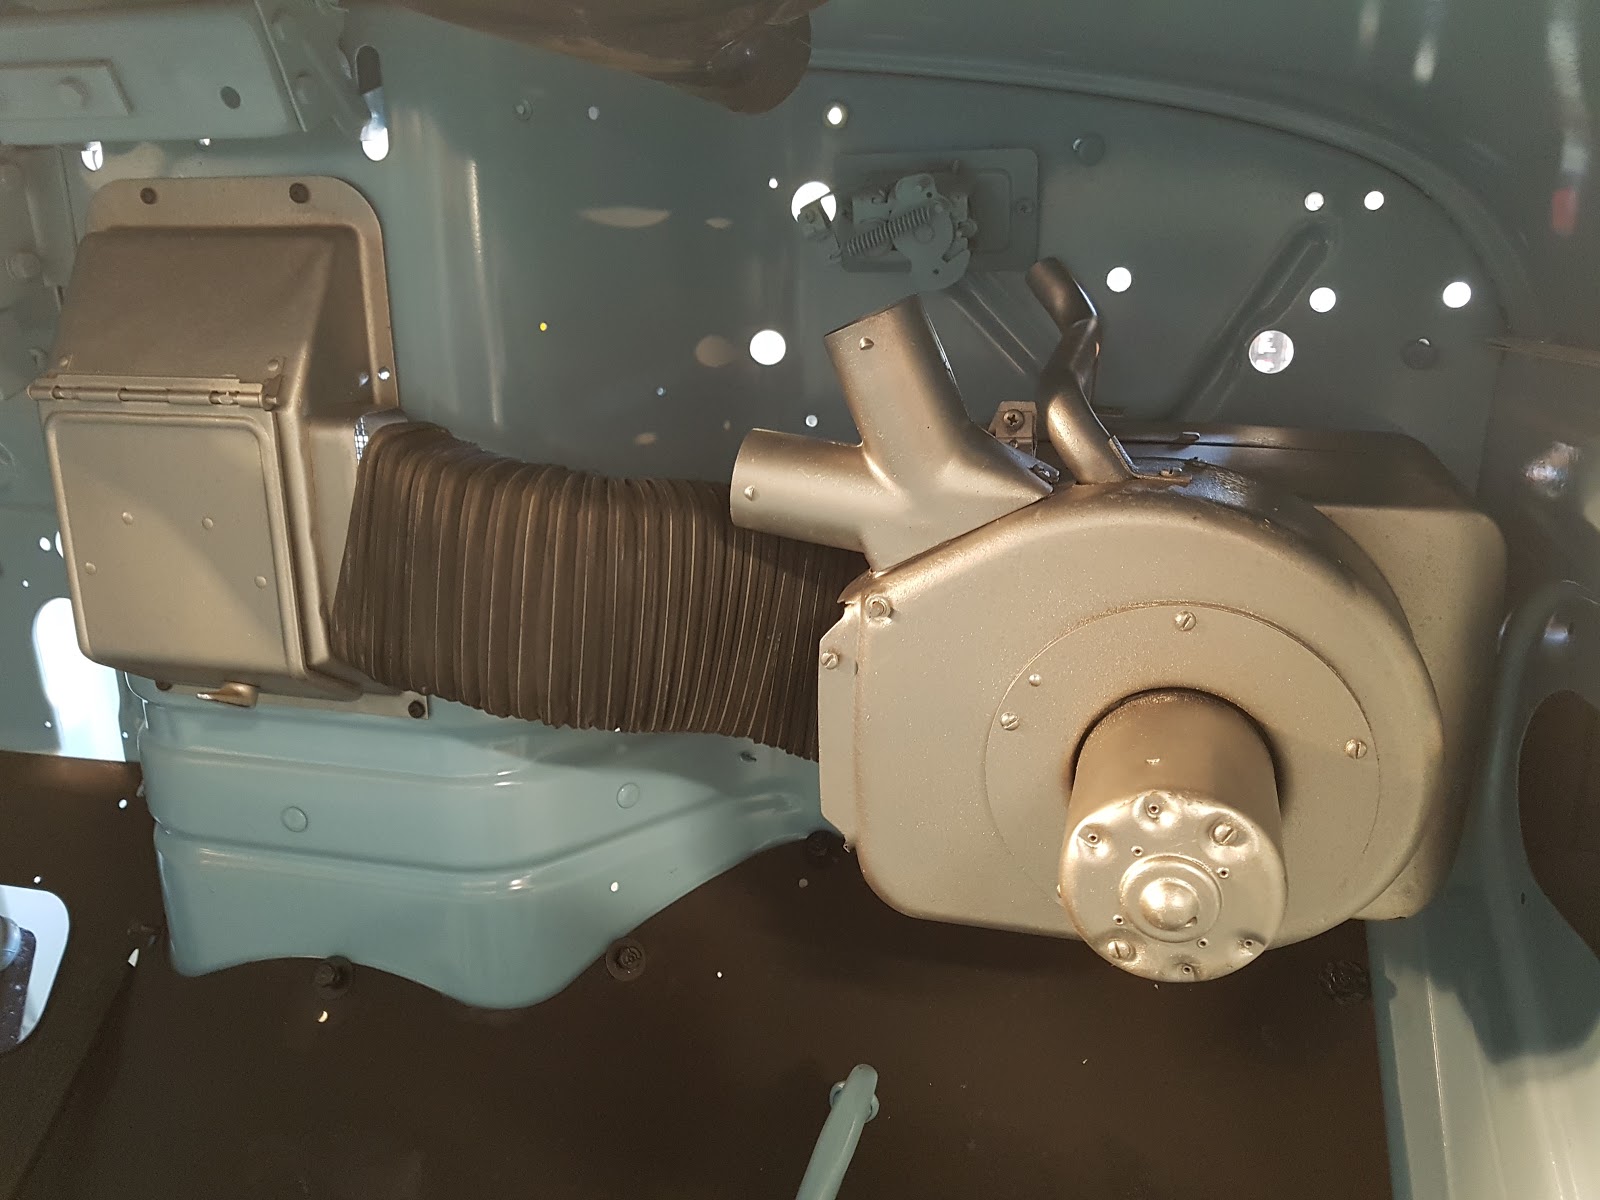
The heater box, motor and central mix-box was tested and installed next.


Windhsheild wiper motor was installed next.


One of the last items needing paint was the gas tank. As it was originally galvanized metal, I wanted to go with a silver hue, which luckily was one of the colors of the POR15 palette...


Unfortunately, the jar I had stored the leftover product in had a bit of an air-leak and - as I've talked at length in previous posts about the incredible hardening nature of this single stage urethane paint -  you'll know that this generally means premature hardening and issues with long term usage...

Sure enough, screw drivers and ice picks would not penetrate the hardened upper most layer:


It looked like it was still liquid further down into the jar, so I drilled a 1/2" hole
 into the top 1\2" hardened layer to get to the usable part below.


After a full coat it looked fantastic and will look 'show' 
once hung in it's original location under the running board.


               Stay tuned for more re-assembly on both the '56 IH 4x4 and the '72 Datsun 240Z!


August 29, 2021

A Comet's re-entry

Saving the Comet  -  metalwork Monday!

With quarter panel skins unavailable, we decided best to save the originals. As moisture and dirt settled into the quarter-rocker seam, that's where the work would be:


With the area cleaned up we inserted a backing strip to weld the new patch panel to: 


The new patch panel was carefully measured and fit:


And tacked in place:


Inisde the wheel well, the rear lower pan was also rebuilt and fully welded in - 


Before: the COMET presented well, but under that paint lurked a large amount of work. 
A car rare - and important - enough, to warrant the effort!

August 26, 2021

1956 International gets a rear bumper

After much deliberation, we finally settled ona  basic design, made from a piece of 5" channel with endcaps welded on.


The longest bit was deciding where to position it. We didnt want it to stick too far out, but tucking it in too far wouldn't protect the lights - and I wanted it to function as a step as well, in case anyone wanted to use it to reach, or hop into, the bed.


Cutting and cleaning what was left of the rear frame section - lopped off long ago for who knows what reason....


Then deciding how far from the TLs it should be to protect from wayward walls and other objects.


With the brackets measured and fabbed


And the appropriate welding protection applied, we where ready to weld


Everything was then removed, sanded, cleaned primed and painted....
And the next day we welded on the brackets, drilled holes for the two to be mounted together and all was assembled.


August 19, 2021

Rebuilding the twin SU carburetors for the 240Z!

This weekend I'm completing the SU carbs rebuild and shining up all the bits before refitting the carbs to the intake runners. The twin SU set up, from rebuild to reassembly can take 6-8 hours!


Also, while we're on this side of the engine, the thermostat and housing needs to be reinstalled...


As I forgot to include a new thermostat when I ordered all the parts for the rebuild, I threw the original one in some boiling water to ensure  it was still in working condition - which it is!


Before starting I collected everything I needed -including the manual,  rebuild kit and all the parts and pieces, doing one side at a time on an old cookie sheet I borrowed from the kitchen... ssssshhh! ;)


 As floats are often WAY off from the factory, adjusting the float level was first up, bending the small tine on the backside of the float and utilizing the little ruler that comes in the rebuild kit to measure 14 millimeters of space between the bottom surface and the float....


Changing out the float nozzle was next.... The new float nozzle was a little different than the old one. Hoping that it's just new and improved.


 And after all of that was done, I reassembled the entire carb assembly with new gaskets and it was time to put it all back together on the engine.

Below the carbs you can see the warm air duct that comes off the exhaust manifold and links up to the airbox...


The entire assembly is very blingy and a defining hallmark of the twin-SU setup used in the Datsun's, as well as some Ferrari's and other interesting marquis of that era.

The original Japanese hose-clamps (known as wire-clamps) came out like new when hit with the wire wheel. Not exactly sure what metal they are made from, but the corrosion was just on the surface and a few minutes on the wire wheel revealed a like-new appearance.


Same with the screws. The one on the left was cleaned and looks painted - but wasn't...


I love restoring cars and I especially love restoring all the nuts, bolts, washers and anything else the car came with. No Gas-Station hose clamps on my rebuilds!


Stay tuned for much more!

August 16, 2021

1956 International "Binder" gets brakes


With the IH on the lift we were able to get at the brakes. Once the wheels and drums where off we could see it would need everything...