fb icon

fb icon
Follow E-tek on fb!

December 15, 2011

Is it the fuel pump? The carb? Floats? Lines? Filter?

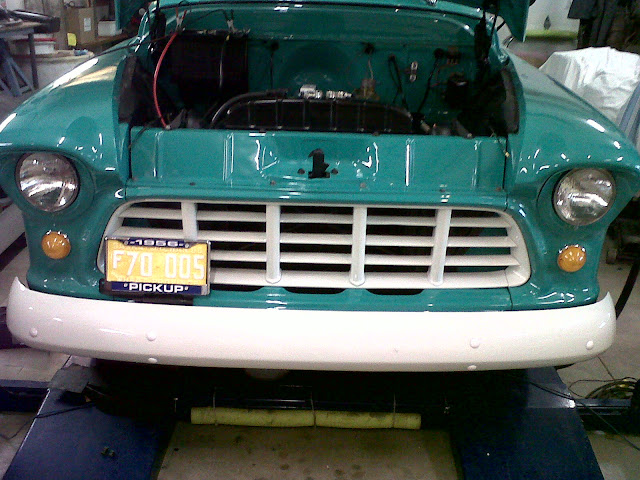
As you'll know if you've been following along, we've spent several days (and many hours)trying to get the beautiful '56 Chevy running - and running properly. Being a scientific thinker and understanding the value of troubleshooting, I have been though every system on the truck in order that it would run as it should. After many different attempts at troubleshooting, we finally got it running, reasonably well, but only while introducing fuel through the carb top.

After rebuilding the carb, trying it with and without the filter, pushing air through the lines, checking the fuel pick up and everything else, it was till only pushing a small amount of fuel out of the pump - and not enough to reach the carb! This is where my love of cars turns into a seething hatred for all things GM!
So what the hell? I know a fuel pump puts out 3-5 psi, so more than a dribble should come out - right?! Right! The odd thing was that when we hooked up a vacuum to the line, we where able to get gas to flow fairly easily.

Then, the proverbial light bulb! There's a short flex-line between the cab and frame lines and it's really the only part that hadn't been removed and checked. So up she went on the BendPak. Sure enough, it didn't even take a second to see that the GD piece was kinked. BAM. Major issue found!


So I bend the lines until the pressure was relieved on the flex-line portion and went back to the engine bay to see what would happen....sure enough, the fuel is now POURING out of that line and into the pump. But even so, it still wouldn't pump all that hard through the old pump. So back on went the new pump, this time: success, now THAT'S what 3-5psi looks like!
But even so, it still ran and bogged as though it wasn't getting enough fuel into the float bowls. So off the carb came for the THIRD time! And here's what I saw:


The float drop measurement - which I just checked when I rebuilt the carb last week - should be 1 3/4". It was more like 2 1/4"! So, after setting it the first time I must have bent it when I opened it up to check the gasket placement....sometimes you can't win for loosing!

To be PERFECTLY HONEST, I have NEVER run into a situation like this in 35 years working on cars. After you learn COMPRESSION-TIMING-SPARK-FUEL things normally move along.

Sure, sometimes you have to troubleshoot every system on your way to get it running, but this thing has been absolutely backbreaking!! It's also been burdensome, exhausting, fatiguing, formidable, grueling, harsh, heavylaborious, murderous, no picnic, onerous, painful, punishing, rigorous, rough, severe, strenuous, taxing, tiring, toilsome, tough, troublesome, trying, uphill. I can't say it any clearer than that!!

Tomorrow, I'll put the carb back together and HOPEFULLY can get this thing moving!!!
Don't forget to check out the website at www.E-tekRestorations.com !

December 13, 2011

Here are the replies and comments from several site I posted these tests on:

From Garage Journal.com


From theoldwizard:
"I have read on several forums that POR15 will not adhere to new metal.  I have no idea what type of metal prep, if any, was done."

It definitely DOES NOT adhere well to new, SMOOTH metal. It needs something to bite into, either surface rust, or properly prepared new metal. You can either sand it with 80 on the DA, grind it, or use Metal Ready/MetalPRep/OSPHO, etc. . They do the job by roughening up the metal enough so that the POR15 can bind. It also doesn't stick to previously painted surfaces without proper prep either.

From kc-steve:
"Is there a recommended time limit before sanding POR-15? Due to the fact that I brush it on, I'd rather try and smooth it out before applying primer and paint."

It does a great job or self-levelling itself, especially if you apply thin coats. If you are going to top-coat with primer or paint, either do so after it's dr but before 24 hours, or  - if you waited longer - use their Tie-Coat primer to tie the two products together.

From widerberg:
"Forgot to say, thanks, E-tek! You got me thinking about these products again.Have you done anything with internal (cavity) rust proofing/preventing? I was going to go with Waxoyl (Waxoyl 120-4) for the inside of my Landy's frame, but cheaped out and bought a couple aerosol cans of Eastwood's similar product instead."

I used Eastwood's Internal Frame Coating and wrote it up on my web site. It seems like it would do the intended job of repelling mositure, since it's an oil/wax substance. I did like the applicator they've come up with - it has a long tube and a broadcast tip so you can get it all the way into enclosed areas like frames and body channels. I haven't looked at long-term results yet through.

From ElectroLight:
"I used Eastwood's Rust Encapsulator on my truck frame (bought a kit) and I'm not impressed.  Not long afterward, the rust started to return.  The rest of the Eastwood products found their way to the trash can, I will use POR15 from now on..."
Thanks for adding your experience.

From widerberg:
"I don't want to hijack the thread, but in the case of my frame, I am going to have it blasted, but wanted to POR-15 or Rust Encapsulate it also. POR-15, especially, I've heard creates a super hard shell, which I like the sound of. Mostly, I'm just going for overkill here in case any microscopic traces of rust survive media blasting."

My preferred method for frames and body panel undersides is just that: sandblast, wipe down with a wax&grease remover and apply 2 coats of POR15, each applied thinly by brush and within 8 -16 hours of eachother.

From the Stovebolt Forums:

"you don't have to sell me on Por15. It's been my drug of choice for years.
I had to grind some off the chassis to weld a bracket for the power steering box on my panel. While I'll admit I used a flap-disk on it I could still tell its some tough stuff. Nuff said!."

From MP&C:
"In using POR as a stand-alone product, painted over slight surface rust as you described, it was on there as if it had been powdercoated. Smacked it with a screwdriver a couple times, didn't even leave a mark. On another occasion, we had some bare metal with some factory finish paint (from mid 50's) next to it, and the POR was used to cover both surfaces (for consistency). After curing, the POR peeled off in sheets from the painted surface."

VERY IMPORTANT!

Number ONE most important thing about POR15 is that it NEEDS soemthing to bite to. Rust is perfect, but if you want to coat new metal or previously painted surfaces, you have to prepare them properly. New metal can be prepped with their Metal Prep, which gives it a slight etch, or it can be sanded with 80 on the DA, or hit with the grinder (though I'd still go over with the DA to make sure it's evenly scuffed). Painted suraces have to be well-sanded. I'd go with 320.

Don't forget to check out the website at www.E-tekRestorations.com !  

December 12, 2011

POR15 vs Zero Rust and Eastwood's Rust Encapulator - NO CONTEST!

A couple years back I made some comments on various websites whereby I said that I couldn't see HOW a spray-can product (such as Zero Rust and Rust Encapsulator) could have the same properties - and therefore work the same - as would products like POR15 ( and now RustBullet), which are single-part epoxy products. (To see my LONG-TERM  POR15 vs RUST BULLET test, please search contents).

Some time after making those comments, the Zero Rust people sent me some of their product and asked me to try it, which I did. After several trials in my restoration business, I still felt the same way, but there where a few voices - some in the profession - saying otherwise. It was then that I decided to do some actual "testing"of these products. As luck would have it, I had also just partnered with Eastwood, so I ordered some samples of their product, Rust Encapsulator,as well.


While not a "scientific" test, it is a "real world" and "as intended" trail. The products where used as recommended, the way an enthusiast would use them in their shops or garages. In every instance, both Rust Encapsulator and Zero Rust were applied from the spray cans supplied, using 3-5 medium wet coats. The POR15 was applied with a brush in a single, thin coat. Regardless of the number of coats or the percieved thickness of product application, all products where applied per instructions, at temperatures near 60F/15C and as you would in practice, to cover rust and confer some protection, as advertised.

I have 3 expereinces (or "tests" if you will) to share with you:

In the first instance, I applied Eastwood's Rust Encapsulator and POR15 to either end of a spare tailgate for my 1946 Mercury truck. This item had lived outside for a long time and had developed an even surface rust, making them the exact surfaces applicable for these products. Since the application of these products, this particular Tailgate was kept inside my shop, dry, at temperatures between 7C and 25C. In this trial then, the products where not subjected to harsh conditions (as per a susequent, ongoing test) so we can see how they age on their own.

After about 2 years one can see that the Rust Encapsulator has "thinned", while the POR15 has remained solid and opaque. Again, this part stayed inside my shop all this time, so I'm not sure why the amount of Rust Encapsulator would have decreased on the panel. Looking closely, you can almost see the rust through the coating in some spots, leading me to believe there is a lack of solids in the product and that one may infer it will ot provide a long-lasting coating.

1946 Mercury Tailgate: On the left is the Rust Encapsulator, on the right the POR15.
Above: If you look closely at the above photo, you'll see how the Rust Encapsulator has - for lack of a better term - worn out. You can almost see through it to the rusted surface in some spots. If exposed to the elements outside, I would guess the product would provide less than optimal protection.

Below is the POR15 coated portion. It still looks solid and opaque. There doesn't appear to be a weakening or wearing of the product and rust-through is non-existent.

Of course that being a fairly easy test and certainly not the one everone wants to see,  I did a second test where the part (another tailgate) was left in the elements for an extended time. This time all three products (POR15, Rust Encapsulator and ZeroRust) where used on a Chevy tailgate that had been exposed to the elements long enough to produce a heavy coating of surface rust on it. After proper application of all 3 products, the tailgate has been left outside, throughout the seasons. This test was started about 6 months ago, so not yet ready to be reported on. I'll do a full posting on the results in another 12-18 months, depending on how fast I see differences in the performance of the products.

This third experience speaks to the compositon of these products, their robustness, as well as their ability to resist chemical degradation and protect what is under them:
We all know that brake fluid is highly toxic to paint - right? In the photo below, the brake backing and tie rod on a 1956 Chevy Truck restoration where brush painted with POR15, but the wheel rim was sprayed with Zero Rust. After bleeding the brakes and getting brake fluid all over both surfaces, the Zero Rust was completely removed while the POR15 was untouched. Up close, one could see the POR15 was completely intact and would likely never be impacted by brake fluid. Again, both surfaces where in prolongued (several days) contact with brake fluid before being noticed and wiped down.

It doesn't take a rocket scientist to know that products in a spray can cannot dry as would an epoxy. If it did, it would ruin the spray tip so that upon second use, it would not spray again! For anyone that has ever used POR15 (which cures in the presence of atmopheric moisture) you know just how hard it dries. It actually WELDS the lid to the can and it dries to a hard shell, regardless of how thickly or thin it is applied. On a suitable surface, POR15 bonds like nothing else you'll ever try.

The exposure test will be the most telling. After 2 years exposure to the elements, in a climate that ranges between 30 below (-28F) to 30 above (120F), we'll be able to say it was tested under the most extreme conditions! So check back to this site often, or better yet, sign up with your email address for update notification!

Don't forget to check out the website at www.E-tekRestorations.com !

December 10, 2011

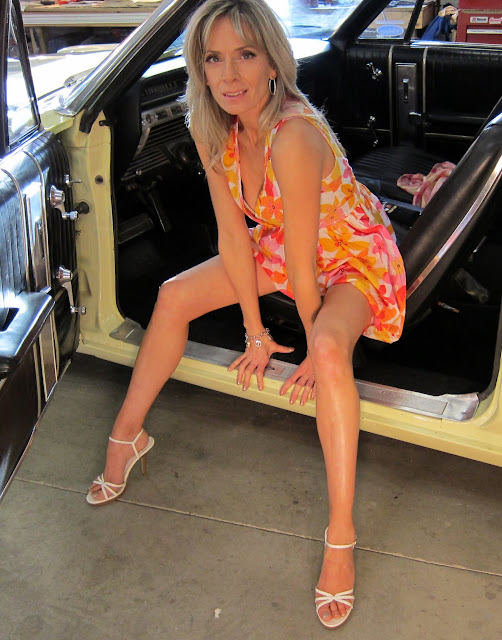
The Mrs E-tek/Chili Hill photo shoot!

As this project will ony be here for a few more weeks, I took the opportunity to shoot some photo's with the "official" E-tek model, Mrs E-tek  (aka "Chili"). 

                                            Here's how the shoot turned out:


Don't forget - there's a nice TRUCK in these photo's.....  ;)


Of course it can't ALL be about the truck - can it?    Here's a few others we shot:


That's it for now - but check back regularily to see new shots of  "chili" and lots more resto-work!

Don't forget to check back in at my website: www.E-tekRestorations.com ! 

December 9, 2011

Lights, decals, ACTION!

More details today......

I put in a "near" final LMC order for the owners and the parts arrived today. All those little things forgotten, overlooked, or just plain missed - until it's nearly done. But what a difference they can make! One of my (many) favourite parts of these restorations are the decals. They make the vehicle look like it just came from the dealership!


....along with the other stuff that came in the package.


This is a Peep Mirror. So small, yet it nearly makes the entire truck!


Interior light cover. You'd never notice it - until it isn't there.

Marker lights. Licence plate and surround.


The plate alone took several hours of work. It was bent, rusty and illegible. An earlier post describes the steps, but in a nutshell: sand-blast, hammer and dolly, then wood paddle and dolly, sand, primer, sand and repeat (x5!), paint lettering white, then clear. When dry apply top color - which all wrinkled due to some mismatched chemical. Strip again, primer, paint raised letters white, clear, top coat again. This time all good. Wet sand  top color off lettering to expose the white, then cleared the entire plate. Nothing to it!


    Don't forget to check out the website at www.E-tekRestorations.com !

December 6, 2011

Electrical issues slowing me down!

Due to the cut steering column harness, the new engine and lights harnesses, as well as having to re-hook every last wire and having to re-time the dizzy.....in addition to the foot-starter system, this sweetheart is proving to be a pain to get running! Even the 1974 Dodge Challenger, with it's complicated MOPAR electrical system, was easier to get running!

I spent some time last weekend re-timing the dizzy (for the third time!), just to be sure. It all matched up again. I reset the points and then turned it over again. It fired, several times and is "close" to running, but still has not. I'm sure it's something simple, but just haven't found this old girls sweet-spot!

Today, with the Internet, it's easy to confer with experts in every area. I started a thread on the Stovebolt Forum and got a little more advice from one of the members there. Once I get back to it Thursday I'll be armed with everything I know, plus anything else I can learn in the meantime. It WILL start!

Which will be bitter-sweet, because it's really the LAST thing that needs to be done. After 350 hours over nearly 2 years, I'll be a little sad to see it done!


Don't forget to check out the website at www.E-tekRestorations.com ! 

December 2, 2011

Finished?? Not by a long shot!!!

Even though I've named a few threads "near completion" or some such thing, the details involved in getting a total resto 'road ready' add up to many hours of work and it's mostl the stuff no-one ever see's. Projects always "look" finished way sooner than they ever get finished. Of course some will alwas say: are they ever really finished?

Over the past couple of weeks - and especially the past couple of days -  I've done a bunch of big and things, front to back, that still needed doing. As well, there's the things you catch on a go-through that take longer than expected. During the run-up to this stage, I kept a list taped to the windsheild where I kept track of a lot of little things that needed doing. Such items included final brake bleed, checking the tranny mount bolts and bending up the safety tabs, checking annd filling the tranny and diff with gear oil and cleaning up any wires that where run down the frame rails.

Besides another two trips around the brake bleeders, including having someone pump the pedal to get that final "hard-pedal" feel, it was the box tie-downs that took the most time. After putting nuts and washers on most of the nearly 70 carriage bolts that go though the bed strips (2 stringers are awaiting missing cross beams), I got to work positioning the entire bed to line up with the bed to frame holes.

The front holes where relatively easy as I was able to line up and drill from the bottom with my short, 90 degree drill:

Above: Lining up the frame to box holes from below.
Below: Drilling up through the box wood with 90 degree drill.

Unfortunately, no matter what I tried, I could not get a drill in from the bottom on the rear holes. I tried shorter bits, putting the bit in first and even using a drill adapter - with no luck. So, with a level, a square and a tape measure, I pinpointed the entry point of the holes and drilled them from the top. God forbid I got it wrong, as there's no hiding a hole here!

As it where, the old adage "measure thrice, drill once" worked.


The owner also brought the new battery over. I switched the one I was using out, which fit perfectly and we put the new one in. Unfortunately, even though the dimensions where the same, the new battery has rails on either side for a plastic carrying handle, which are now in the way of the top hold-down frame. We'll either have to remove them, or find one without those rails....  Add that to the list.


During all this work, I was also doing some final prep on the original 1956 "farm" plate. After sanding the yellow to expose the white lettering underneath, I masked it all up again to do a final coat of white on the large letter and numbers:

In case ou missed the procedure, the plate was first sprayed white, then a few coats of clear where applied. After that, the entire plate was coated in yellow.


Finally, the raised letters and numbers are wet-sanded to reveal the white underneath:


As the plate is so old and had sustained a lot of damage over the years, it was difficult to remove all of the yellow from the large letter and numbers without going through to the metal. I opted to mask it up once more and spray several more coats of white on those areas. Better too much paint than too little!


Unmasked, here is the (near) final product - I'll just touch up the smaller letters and it can be mounted on the front of the Chevrolet again!

Today in the mail was my own plate, for our '46 Merc Truck, When we got the truck several year back, my youngest son Colton named it the "Old Man" and we've referred to it as that ever since. THAT's how memories are built!


I wonder how long the undersides of these trucks looked like this after purchase....and then I wonder how long this one will too.....

While under the truck, I checked the gear oil levels and added half a quart of gear oil to the pumpkin and nearly a quart to the tranny! You can bet these haven't been topped up for 30 or more years - if ever!  The "Old Man", (our 46 Merc truck) drank 1.5 quarts when I got him, which made one hell of a difference in shifting ease and decreased running noise substantially!

Another detail was routing and protecting the rear light wires:


After wiring up the taillights, I installed all the wires in corrugated wire wrap. This will not only keep them protected, but, mabe more importantly on this vehicle, looks clean and organized!


Finally, I spent some more time in the engine bay. The owners wanted to be here when the engine fires and runs for the first time - which is a great idea for sure, but it can go south quickl if you invite everyone over and the troubleshooting takes 8 hours!!
So, in order to facilitate that day, I put some gas in the carb and kicked it over, only to get a couple more back-fires, even though I rotated the dizzy 180 degrees. So, once again I removed the #1 plug, cranked it over to get it to TDC and then re-strung the wires as per firing order. I also noticed a little gas leaking around the phenolic carb spacer, so I quickly fabbed up some gaskets for that too.

Once the carb was removed and gasketted, I cinched it back down, added some more fuel and cranked the engine over - success! The engine fired and ran for a few seconds.....however that RARELY means it's ready to run for any longer than that....

Then, as if to confirm my suspicions that it would be ready to run quite yet, as I tried to relight it, the starter began to act up. It would either get hung up on the flywheel and not turn, or release and then not re-engage. Then, just as I was going to remove it to see what was happening, the 3 o'clock bell sounded  - time to pick up the kids from school!

It'll have to get pulled tomorrow!

Don't forget to check out the website at www.E-tekRestorations.com !

November 28, 2011

A couple months ago, I purchased a complete, running, 390 FE FORD engine, which I removed from the '68 F150 truck it was residing in. My plans are to do a full rebuild on it, then add some sort of power-adding kit and stuff it in my 1967 Galaxie 500XL convertible. I'd like it to be as reliable as is the 390 that's in it now, but get about 500HP by 5000RPM.

The current mill in the Gal has really turned me into an FE believer. It has NEVER balked in the 8 years I've owned it and for who-knows how long before that. It's only a 2 bbl, but runs as strong as any 4 bbl motor I've had. I'm guessing it only pushes about 250hp right now, maybe less, so my goal of 500hp would make a healthy difference, even in a 4000 lb land-yacht!

One tact would be to go with Edelbrock's Performer RPM package. The heads/Intake/Cam combo will   easily meet my power and reliability goals, but is rather pricey. Below are the Edelbrock-recommended parts needed to turn a base 390 FE into a Vic-stoked powermill:

Edelbrock 7505 - Edelbrock Performer RPM Dual-Quad Air-Gap Intake Manifolds   $43

700CFM HolleyCarb  $400
Total = $2001, which, as we all well know, will be closer to $3000 minimum once installed!
All in, I could see this build being in the car for about $3000.
The other way to go, would be a reasonably stock rebuild, with a cast crank and pistons, but then adding a universal T3/4 Turbo kit. These kits sell for about $1000 online, but require a LOT more fabrication work. This work includes making up an exhaust manifold/turbo intake flange system, plus routing and connecting of the various inlet and exhaust tubes, intercooler parts and oil lines.
All in, the smoke would likel clear somewhere around $2500 with this method of adding power.

The debate continues!


Don't forget to check out the website at www.E-tekRestorations.com !

November 27, 2011

Today, being Sunday, was reserved for family time, as well as some clean-up and organizing in the shop. My son Colt came in (in his PJ's!) and decided to do some work on his project, the 1971 Datsun 240Z. Of course it's up on the rotisserie, so he has to step in through the sunroof....


Having several engines that need rebuilding in the shop, I needed more shelving for storing the parts. As anyone who's taken apart a car or engine knows, as soon as you take something apart, it's space requirements expand exponentially. If you don't a lot of empty space to put all the parts, fasteners and new stuff, you'll end up piling parts on top of other stuff, making a mess and you risk becoming totally disorganized. 

I save everything.  to make the shelves, I took a bunch of scrap wood from a deck I dismantled about 5 ears back, as well as some bi-fold closet doors that came out of our bedroom for the renovation. Now re-purposed, I have an extra 15' of shelf space to store the engine parts!


Don't forget to check out the website at www.E-tekRestorations.com ! Special thanks to www.Eastwood.com and www.CarCraft.com !

November 26, 2011

Details and parting shots

The owners son and grandson spent the day here today. This beautiful truck, with it's important family lineage, will be handed down through these generations and it was a thrill to have them here to photograph while it was being put together. As a restorer, I find it very satisfying to bring any vehicle back from a wreck to a show-stealer, but when there's a story behind the vehicle, especially one that involves family memories, it makes my work all the more special.

While the kids played in the yard, inside with the Lego-Batman Wii game, or in the shop (carefully!), I layed under the truck threading nearly a hundred nuts on the bed's carriage bolts. It was a tedious two-man job so it was nice to have someone to help me out by holding the tops still.

Warren also shaved some clips we needed for the front Windshield moulding, by running them against the grinding wheel. Unfortunately, although these replacement plastic clips looked like the would work, they still wouldn't hold the moulding as tightly as did the original clips. Below is the clip, in it's receptacle (without the moulding):


Back to the drawing board with this one!


The side rail bolt holes still needed to be drilled through the bed wood pieces. After drilling, I brushed in some clear lacquer to provide protection to the wood. As you will sometimes find, the supplied bolt kit came with some incorrectly included fasteners. In this case there where carriage bolts of a larger size, which didn't fit anywhere, necessitating another trip to the bolt supply store - thanks Warren!


As is often the case with car/garage guys, the next generations get indoctrinated into the car and truck culture early! Even though the owners of this beauty don't have their own garage, memories will be forged by having them come in and take part - or play - while this one is being restored. I know first-hand what it's like to have fond memories of seeing vehicles built my Dad and plaing in the shop, so I always encourage people to bring their own kids  - and family members - around as the project progresses.

The owner's grandson Alex has the red hat, while my own son, Colt is in the blue jacket. As you can tell by their attire, it's winter in Saskatchewan!


Checking lug nuts....


As I've said before - it's all in the details. Can you spot the addition?


We put it back on the hoist to get the last items buttoned up. I still need to bleed the brakes, tighten a few more fasteners, wire up the taillights and get the engine broken in - all the fun stuff! One thing is certain: it's easy to rush it out at this point. The customers are excited, it looks finished and I have other projects to move on to. But it's imperative to take some time here and get everything done and done right. The last thing anyone wants (especially me!) are minor annoyances, like a tailight that won't work or a loose trim piece, that detract from the 300 hours of hard work that went into the build.


Don't forget to check out the website at www.E-tekRestorations.com ! Special thanks to www.Eastwood.com and www.CarCraft.com !